
Unleash Creative Expression: The Art of Straw Blowing
Table of Contents
- Unleash Creative Expression: The Art of Straw Blowing
- Getting Started with Straw Blowing
- Materials You’ll Need
- Step-by-Step Instructions
- Expanding Your Creative Horizons
- Unleash Creativity: A Fun and Easy Blow Painting Technique
- Setting Up Your Artistic Workspace
- Applying the Paint: The Foundation of Your Artwork
- The Magic of Breath: Creating Flowing Designs
- Building Layers and Expanding Your Vision
- What Exactly Is Blow Painting?
- Choosing the Right Paint for Blow Painting
- Mastering the Blow Painting Technique
- Beyond the Basics: Expanding Your Blow Painting Horizons
- More Fun Painting Ideas for Kids
- Unlock a World of Artistic Exploration with The Trendy Type
- Check out our TheTrendyType Starter Pack!
- Unleash Creativity: A Guide to Straw Blowing Art
- The Allure of Fluid Art & Straw Blowing
- Materials You’ll Need for Straw Painting
- Step-by-Step Guide to Creating Straw Blown Art
- Beyond the Basics: Advanced Techniques & Inspiration
- Straw Blowing Art: A Fun Activity for All Ages
- Safety Considerations
Straw blowing is a delightfully simple yet captivating art technique that encourages experimentation and yields wonderfully unique results. This process transforms ordinary paper into vibrant displays of color and form, offering an engaging activity for artists of all ages. It’s more than just a craft; it’s an exploration of cause and effect, a lesson in color blending, and a fantastic way to foster creativity. In a world increasingly dominated by digital art, this tactile experience provides a refreshing return to fundamental artistic principles.
Recent studies show that engaging in art activities like straw blowing can significantly reduce stress and improve cognitive function, making it a beneficial pastime for both children and adults. It’s a perfect addition to our curated collection of art activities for kids, and we’re confident you’ll discover why it’s become a beloved favorite.
Watch this video to see straw blowing in action and then continue reading for detailed step-by-step instructions.
The beauty of this technique lies in its unpredictability. Each attempt results in a one-of-a-kind creation, with colors swirling and merging in unexpected ways. It’s incredibly satisfying to witness the paint spread and transform, creating organic patterns and captivating designs.
Getting Started with Straw Blowing
Materials You’ll Need
To embark on your straw blowing adventure, gather the following supplies:
Paper: Opt for sturdy paper like cardstock or watercolor paper to prevent the paint from bleeding excessively. Heavier weight paper will also hold up better to multiple blowing sessions.
Liquid Watercolors: These provide the most vibrant and fluid results. Explore different color combinations to create stunning effects.
Dropper or Pipette: This tool allows for precise application of the liquid watercolor, giving you greater control over the paint distribution.
Drinking Straws: Standard drinking straws work perfectly. Consider using a variety of straw widths for different effects.
If liquid watercolors aren’t available, you can easily create a substitute by diluting food coloring or tempera paint with water.
Step-by-Step Instructions
- Prepare Your Workspace: Cover your work surface with newspaper or a plastic tablecloth to protect it from paint splatters.
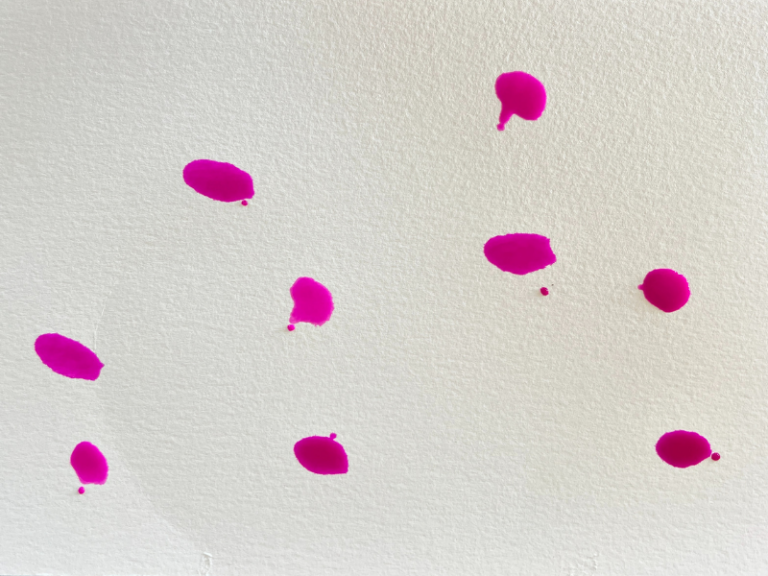
- Apply the Paint: Using the dropper or pipette, place several drops of liquid watercolor onto the paper. Experiment with different color combinations and spacing. Remember, less is more – you can always add more paint later.
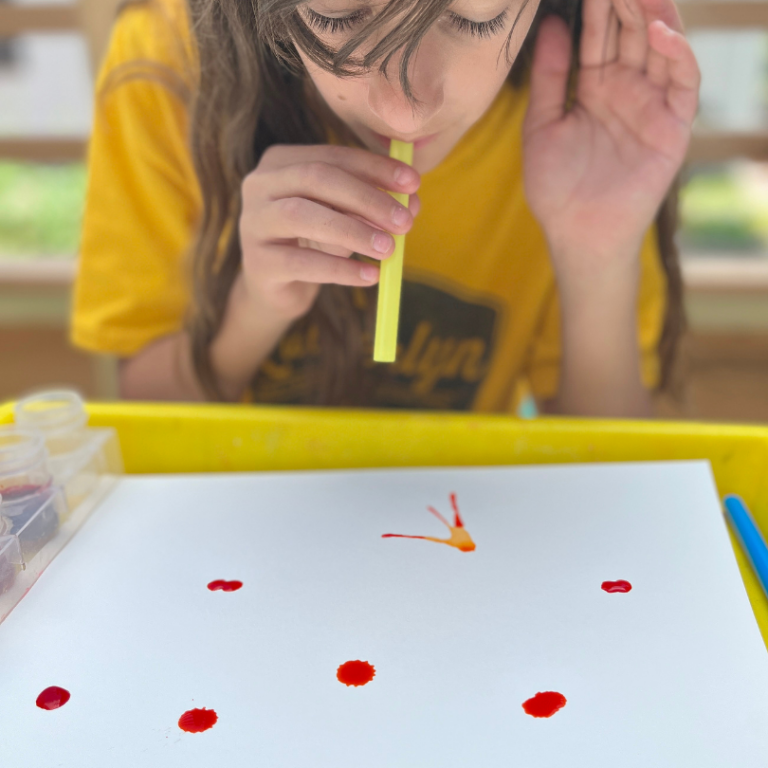
- Start Blowing: Position your mouth over one end of the straw and gently blow through it, directing the airflow towards the paint droplets. Observe how the paint spreads and blends as you blow.
- Control the Flow: Vary the intensity and direction of your blowing to create different patterns and effects. Experiment with short, controlled puffs and long, sustained blows.
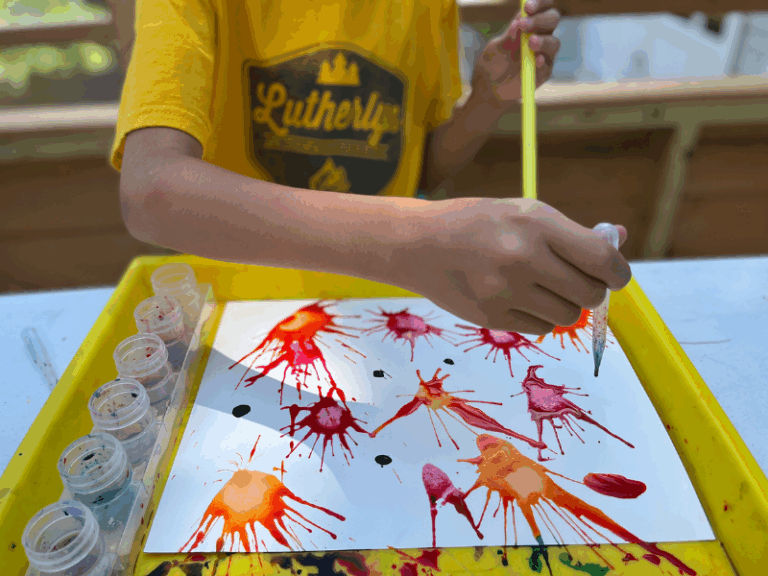
- Layer and Repeat: Once the initial layer of paint has dried slightly, you can add more drops of paint and repeat the blowing process to create layered effects and intricate designs.
- Let it Dry: Allow the finished artwork to dry completely before handling or displaying it.
Expanding Your Creative Horizons
Don’t be afraid to experiment with different techniques and materials to personalize your straw blowing artwork. Here are a few ideas to get you started:
Masking: Use masking tape or stencils to create defined shapes and patterns.
Salt: Sprinkle salt onto the wet paint to create textured effects.
Glitter: Add glitter to the paint for a sparkling finish.
Different Paper Types: Explore using different types of paper, such as textured paper or metallic paper, to create unique visual effects.
Straw blowing is a fantastic way to explore the principles of color blending and create stunning abstract art. It’s a simple yet rewarding activity that encourages creativity, experimentation, and self-expression.
For more inspiring art ideas and techniques, be sure to explore our comprehensive guide to art for beginners.
Unleash Creativity: A Fun and Easy Blow Painting Technique
Looking for a unique and engaging art activity that’s perfect for all ages? Blow painting offers a mesmerizing experience, transforming simple liquid watercolors into stunning, abstract designs. This technique is not only visually captivating but also encourages breath control and artistic exploration. It’s a fantastic way to introduce children to the joy of painting while fostering their creativity and fine motor skills.
Setting Up Your Artistic Workspace
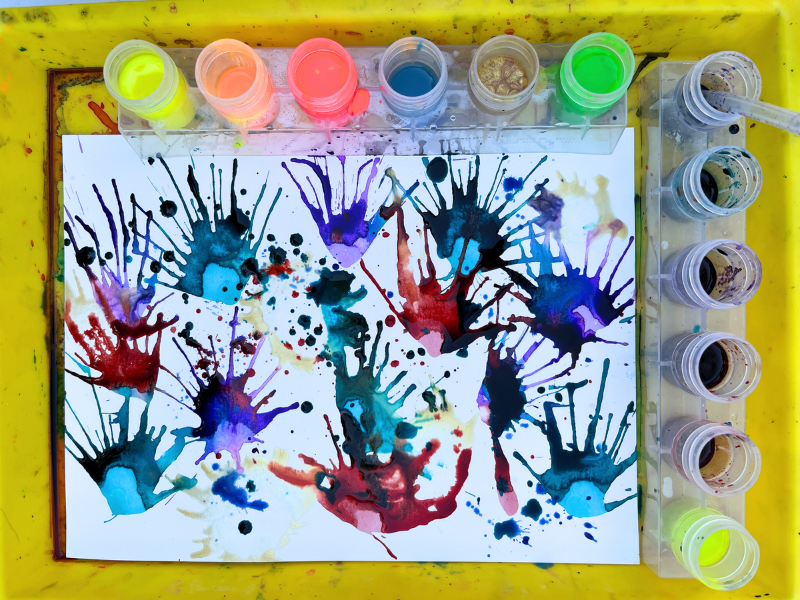
Before you begin, preparation is key to a smooth and mess-free experience. First, protect your work surface – a tray with raised sides is ideal, or consider moving the activity outdoors for ultimate freedom. This will contain any stray paint splatters. Next, prepare your tools. Cut drinking straws in half; shorter straws make it easier for little lungs to generate enough force. For younger children, a small pinhole near the top of the straw can prevent accidental paint ingestion. gather your liquid watercolors and place them in individual paint cups or small dishes, ready for use.
Applying the Paint: The Foundation of Your Artwork
Now comes the exciting part! Using a dropper or a small paintbrush, carefully transfer droplets of liquid watercolor onto your paper. Don’t be afraid to experiment with different colors and spacing. The more varied your paint distribution, the more dynamic your final artwork will be. Remember, there are no rules – let your imagination guide you! Consider exploring color theory and how different hues interact – a great starting point for learning about art fundamentals (https://thetrendytype.com/art-fundamentals).
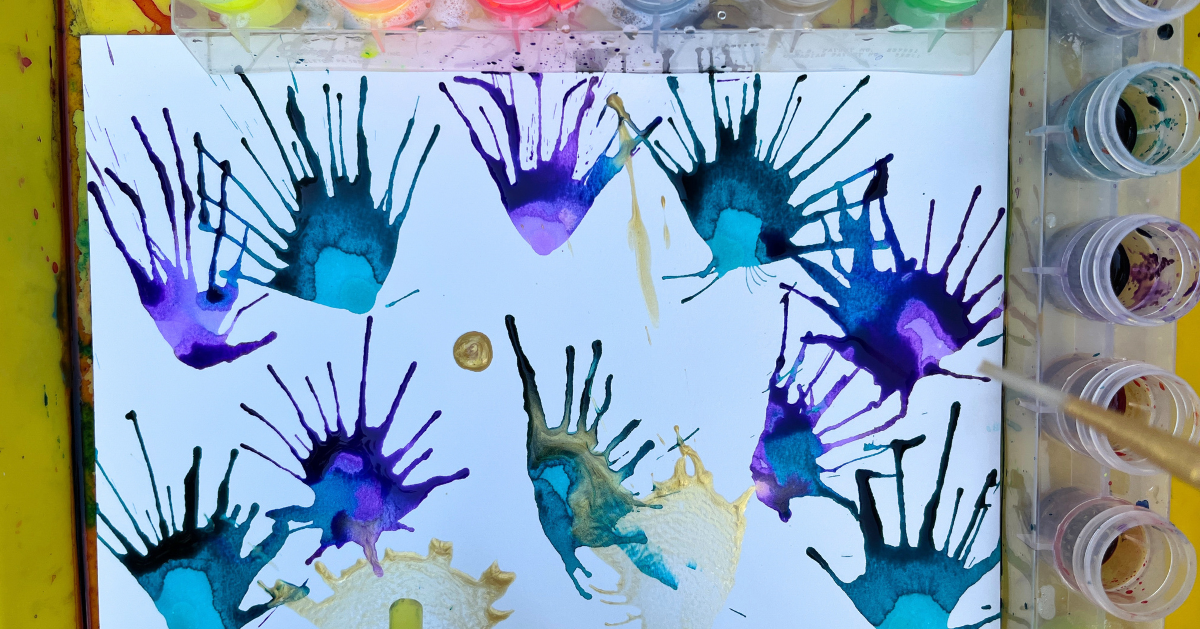
The Magic of Breath: Creating Flowing Designs
Once your paper is dotted with vibrant colors, it’s time to bring them to life! Gently blow through the straw, directing the airflow towards the paint droplets. Watch in amazement as the paint spreads and dances across the paper, creating intricate patterns and flowing rivulets. Encourage experimentation with different blowing strengths and angles to achieve a variety of effects. This technique is a wonderful way to explore the concept of mixed media art (https://thetrendytype.com/mixed-media-art) and how different materials can interact.
Building Layers and Expanding Your Vision
Don’t stop at the first layer! Repeat the process of adding paint droplets and blowing through the straw, layering colors and building up your design. This allows for greater depth and complexity, creating truly unique and captivating artwork. Feel free to introduce new colors and experiment with different techniques – the possibilities are endless. For inspiration and further exploration of artistic techniques, check out our guide to watercolor painting for beginners (https://thetrendytype.com/watercolor-painting-beginners).
Once your masterpiece is complete and thoroughly dry, consider how you can showcase your creativity. Display your artwork proudly, or repurpose it into handmade cards, unique wrapping paper, or captivating collage elements for future art projects.
Unleash Creativity with Breath: A Guide to Blow Painting
Blow painting is a delightfully simple art technique that transforms ordinary paper into vibrant, abstract masterpieces. It’s an accessible activity for artists of all ages, encouraging experimentation and fostering a sense of playful discovery. This method utilizes the power of breath to manipulate paint across a surface, resulting in unique and unpredictable designs.
What Exactly Is Blow Painting?
At its core, blow painting is an action art process. Instead of brushes or traditional tools, you use a straw to direct the flow of liquid paint. A few drops of color are placed on paper, and then, with gentle puffs of air, you can ‘blow’ the paint outwards, creating swirling patterns, organic shapes, and captivating textures. It’s a fantastic way to introduce children to the joy of art without the pressure of perfection.
Choosing the Right Paint for Blow Painting
The key to successful blow painting lies in the consistency of your paint. You’ll want a fluid medium that moves easily with your breath. Here are a few excellent options:
Liquid Watercolors: These provide brilliant, transparent colors and are ideal for creating ethereal effects.
Diluted Tempera Paint: Tempera paint, when thinned with water, offers a wider range of opaque colors. Experiment with different water-to-paint ratios to achieve your desired consistency.
Food Coloring: A readily available and non-toxic option, food coloring is perfect for younger artists. Be mindful that the colors may be less vibrant than other paints.
Remember to avoid using thick paints, as they won’t move easily with your breath. A thinner consistency is crucial for achieving the desired effects. For more information on choosing art supplies, explore our guide to essential art supplies for kids.
Mastering the Blow Painting Technique
The process is remarkably straightforward:
- Prepare Your Surface: Place a sheet of paper on a protected surface. Newspaper or a plastic tablecloth works well.
- Apply the Paint: Drop small amounts of paint onto the paper. You can use a single color or create a rainbow of hues.
- Blow the Paint: Position a straw (preferably a non-bendy one) just above the paint droplets. Gently blow through the straw, directing the paint across the paper.
- Experiment and Have Fun: Vary the angle and intensity of your breath to create different patterns and textures. Don’t be afraid to experiment with different colors and techniques.
For a truly unique effect, try tilting the paper while blowing the paint. This will create dynamic, flowing designs.
Beyond the Basics: Expanding Your Blow Painting Horizons
Once you’ve mastered the basic technique, you can explore a world of creative possibilities.
Create Silhouettes: Blow paint around stencils or cut-out shapes to create striking silhouettes.
Layer Colors: Allow layers of paint to dry before adding new colors, creating depth and dimension.
Combine with Other Techniques: Integrate blow painting with other art forms, such as drawing or collage.
Looking for more action art ideas? Check out our article on splatter painting for kids – another fun and messy way to unleash creativity!
More Fun Painting Ideas for Kids
Here are a few more painting activities to inspire your little artists:
7 Fun Painting Ideas for Kids
Painting with Wheels for Kids
How to Do Marble Painting for Kids
How to do Splat Painting for Kids
* How to Do Scrape Painting
Unlock a World of Artistic Exploration with The Trendy Type
Want even more creative ideas?
Check out our TheTrendyType Starter Pack!
Engage your kids through art and creativity with this printable booklet where you’ll find all of our best tips, tricks, and ideas for getting started on your artful parenting journey!
Unleash Creativity: A Guide to Straw Blowing Art
Looking for a fresh, engaging art activity that’s both simple and surprisingly sophisticated? Straw blowing art offers a unique avenue for artistic expression, perfect for children and adults alike. This technique moves beyond traditional painting, encouraging experimentation with color, form, and the fascinating physics of air pressure. It’s a fantastic way to foster creativity and develop fine motor skills, all while creating beautiful, abstract pieces. The appeal of straw blowing lies in its unpredictability. Unlike brushstrokes that offer direct control, blowing paint with a straw results in organic, flowing patterns. This element of chance encourages artists to embrace imperfections and appreciate the beauty of serendipity. It’s a gateway into the world of fluid art, where the medium itself plays a significant role in the final outcome. In 2024, fluid art continues to gain popularity, with a 15% increase in searches related to abstract painting techniques, demonstrating a growing desire for expressive, non-representational art. Getting started with straw blowing art is remarkably easy. You likely already have many of the necessary supplies on hand. Here’s a comprehensive list: Paper: Heavyweight paper, watercolor paper, or even cardstock works best to prevent the paint from bleeding excessively. Once you’ve mastered the basic technique, you can explore more advanced methods to elevate your straw blowing art. Masking: Use masking tape or stencils to create defined shapes and patterns. Looking for inspiration? Check out our guide to abstract painting techniques (https://thetrendytype.com/abstract-painting-techniques) for more ideas on creating expressive artwork. Straw blowing art isn’t just a visually appealing activity; it’s also incredibly beneficial for developing various skills. For children, it enhances fine motor skills, hand-eye coordination, and creativity. It also introduces basic scientific concepts like air pressure and fluid dynamics in a fun and engaging way. Adults can enjoy the meditative quality of the process and the freedom to express themselves without the constraints of traditional art techniques. If you’re looking for more creative activities for kids, explore our collection of DIY art projects (https://thetrendytype.com/diy-art-projects). While straw blowing art is generally safe, it’s important to take a few precautions: Never suck on the straw. This could ingest paint. With a little creativity and experimentation, you can unlock a world of artistic possibilities with straw blowing art. So gather your supplies, unleash your imagination, and let the colors flow! And don’t forget to share your creations with us on social media using #thetrendytypeart! For more inspiration and art tips, visit our art supplies guide (https://thetrendytype.com/art-supplies-guide).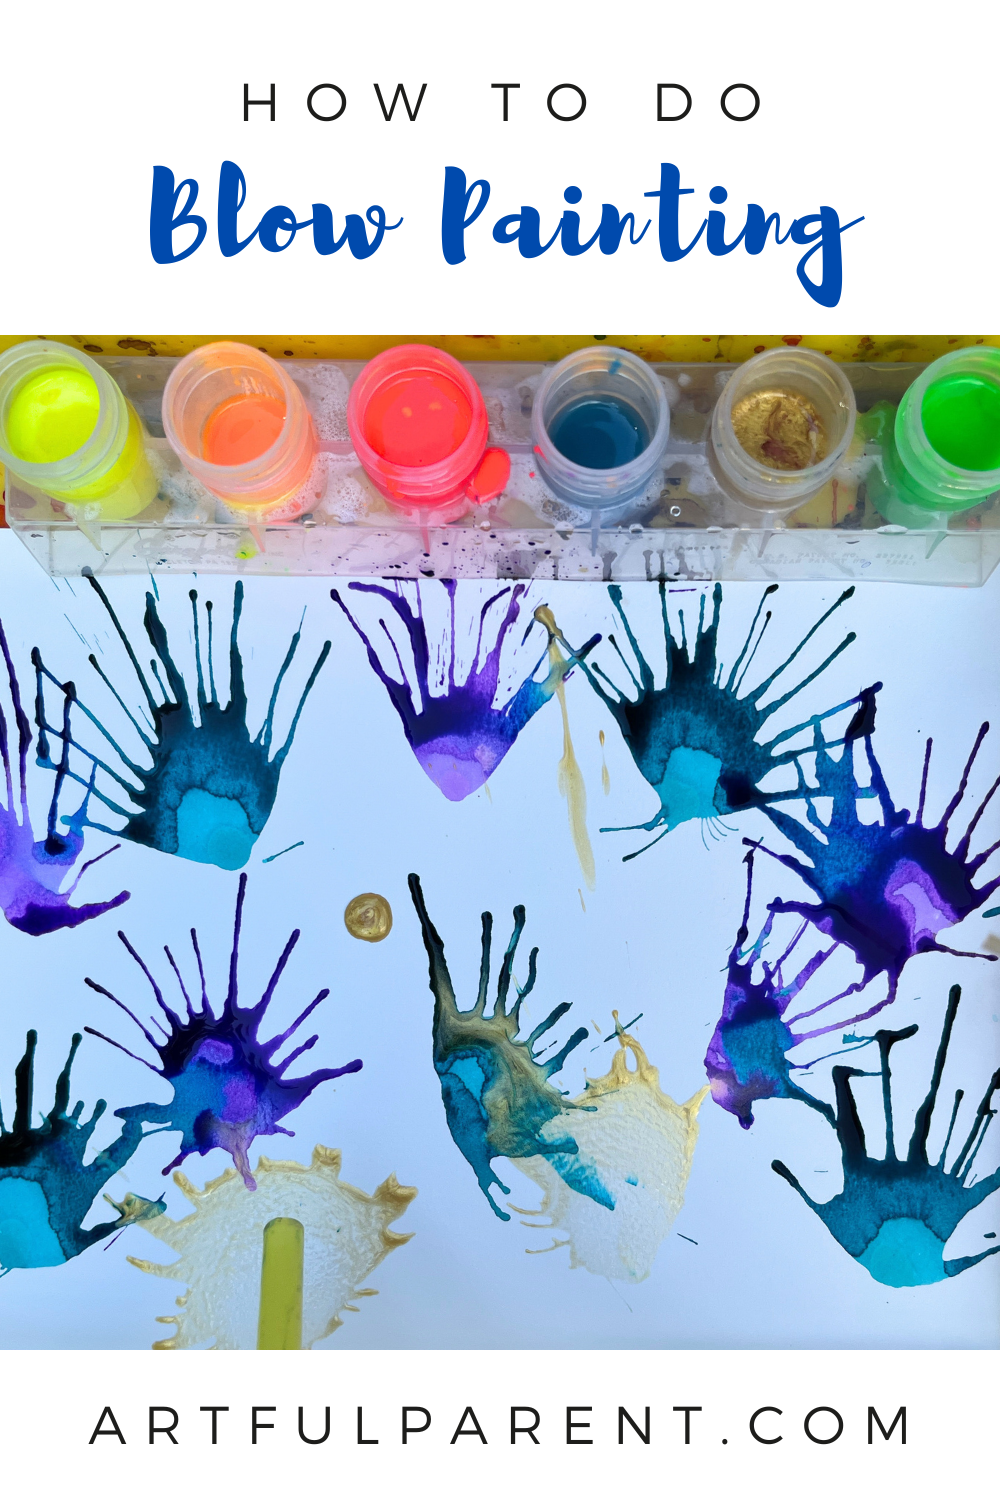
The Allure of Fluid Art & Straw Blowing
Materials You’ll Need for Straw Painting
Paint: Liquid watercolors are ideal due to their vibrant colors and fluidity. Tempera paint thinned with water also works well. Consider exploring different paint consistencies to achieve varied effects.
Straws: Standard drinking straws are perfect. Experiment with different straw widths for varying line thicknesses.
Water: For diluting paints and cleaning up.
Droppers or Small Spoons: To apply paint to the paper.
Protective Covering: Newspaper or a plastic tablecloth to protect your work surface.
Optional: Glitter, sequins, or other embellishments to add texture and sparkle.Step-by-Step Guide to Creating Straw Blown Art
Beyond the Basics: Advanced Techniques & Inspiration
Salt Effects: Sprinkle salt onto wet paint to create unique textures and crystalline patterns.
Alcohol Inks: Experiment with alcohol inks for vibrant, translucent effects.
Mixed Media: Combine straw blowing with other art techniques, such as drawing, collage, or stamping.Straw Blowing Art: A Fun Activity for All Ages
Safety Considerations
Supervise children closely.
Use non-toxic paints.
* Ensure adequate ventilation.