Unleash Creativity with Glowing Cardboard Constructions
Table of Contents
- Unleash Creativity with Glowing Cardboard Constructions
- Why Choose Cardboard and Neon?
- Getting Started: Materials You’ll Need
- Step-by-Step Guide to Building Glowing Sculptures
- Expanding the Creative Possibilities
- Unleash Creativity: Cardboard Sculpting for Kids
- Why Cardboard is the Perfect Sculpting Medium
- Getting Started: Materials & Preparation
- Building the Sculptures: A Step-by-Step Guide
- The Power of Process-Based Art
- Beyond Cardboard: Expanding the Sculptural Experience
- Why Cardboard Sculptures are a Fantastic Creative Outlet
- The Benefits Extend Beyond Artistic Skill
- Gathering Your Materials: A Simple Supply List
- Step-by-Step Guide to Building Neon Cardboard Creations
- Inspiring Ideas for Cardboard Sculptures
- Safety First: Important Considerations
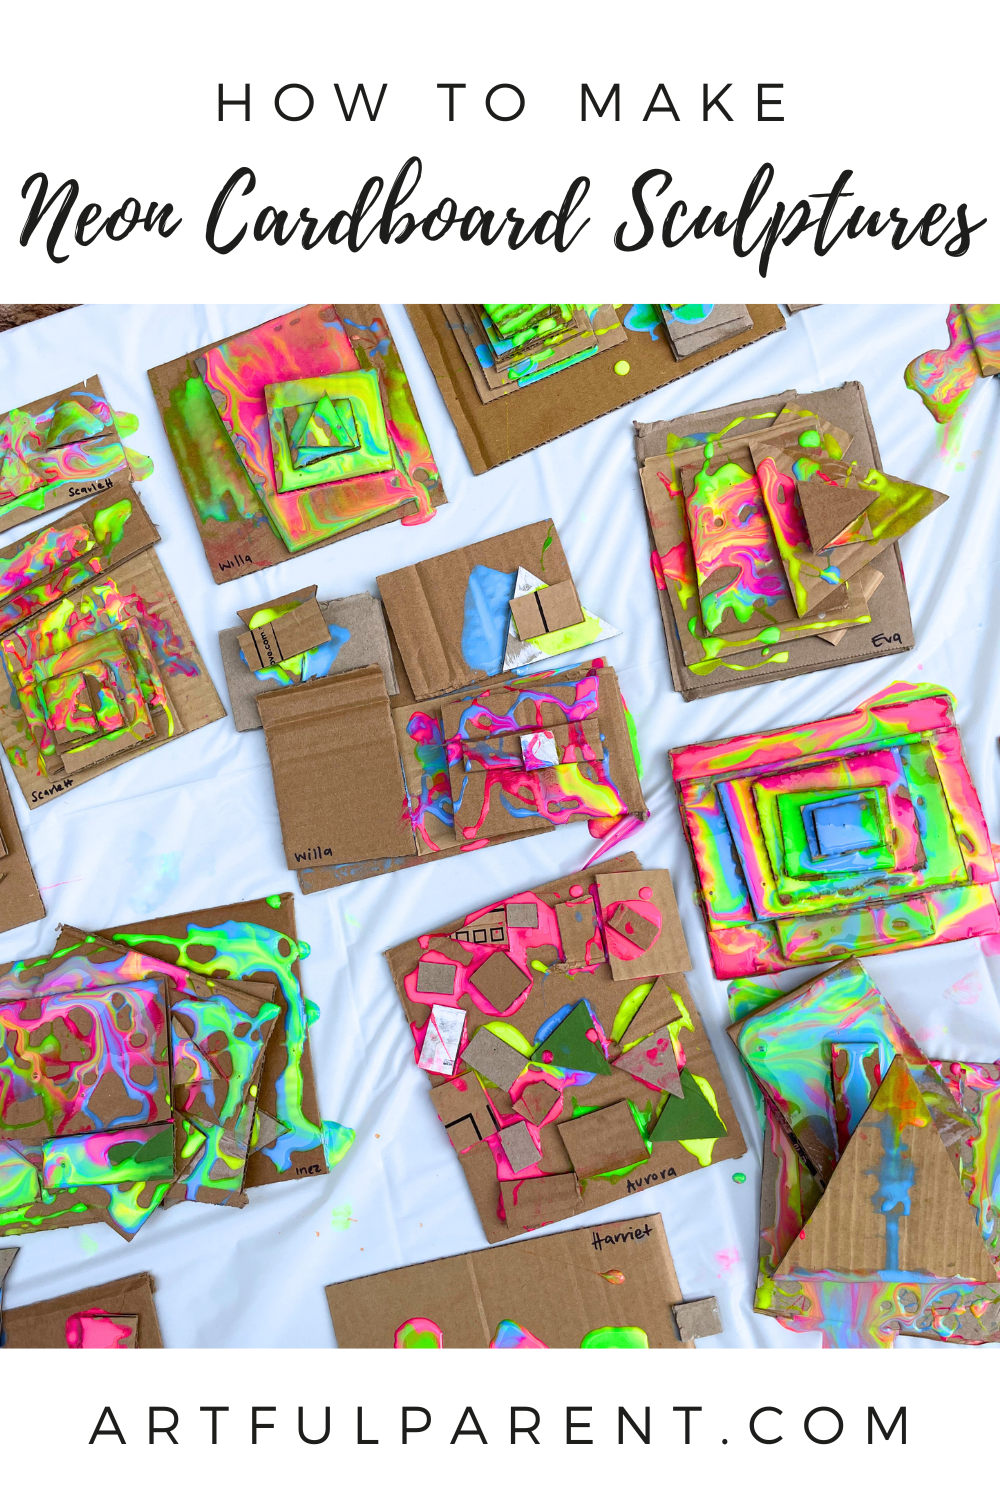
Looking for a vibrant and engaging art activity that encourages open-ended exploration? This project guides you through creating stunning, glowing cardboard sculptures with kids, transforming recycled materials into dazzling works of art. Perfect for fostering imagination and artistic expression in children of all ages, this process art experience is as much about the journey as the final result. In a world increasingly focused on structured activities, allowing children the freedom to experiment with materials and create without constraints is more important than ever. Studies show that process art boosts self-esteem and problem-solving skills, making it a valuable addition to any child’s creative toolkit.
Why Choose Cardboard and Neon?
Cardboard offers a fantastic, readily available canvas for young artists. Its versatility allows for building, layering, and sculpting, while its inherent texture adds visual interest. Pairing cardboard with neon colors creates a striking contrast and a playful aesthetic that immediately captures attention. The bright, almost electric hues inspire creativity and add a modern touch to these unique constructions. Plus, utilizing recycled materials teaches children about sustainability and the importance of repurposing items.
Getting Started: Materials You’ll Need
To embark on this artistic adventure, gather the following supplies:
Recycled Cardboard: Collect various cardboard pieces – boxes, cereal boxes, packing materials – and cut them into a mix of squares, triangles, strips, and other shapes. Having a larger base piece for each child is recommended.
Neon Tempera Paint: Choose a selection of vibrant neon tempera paints to create eye-catching sculptures. Explore different color combinations for added visual impact. You can find a great selection of neon paints at TheTrendyType.to/3UkkRQe.
White School Glue: A generous supply of white school glue will act as the adhesive for your cardboard creations. Consider using non-toxic glue for younger children.
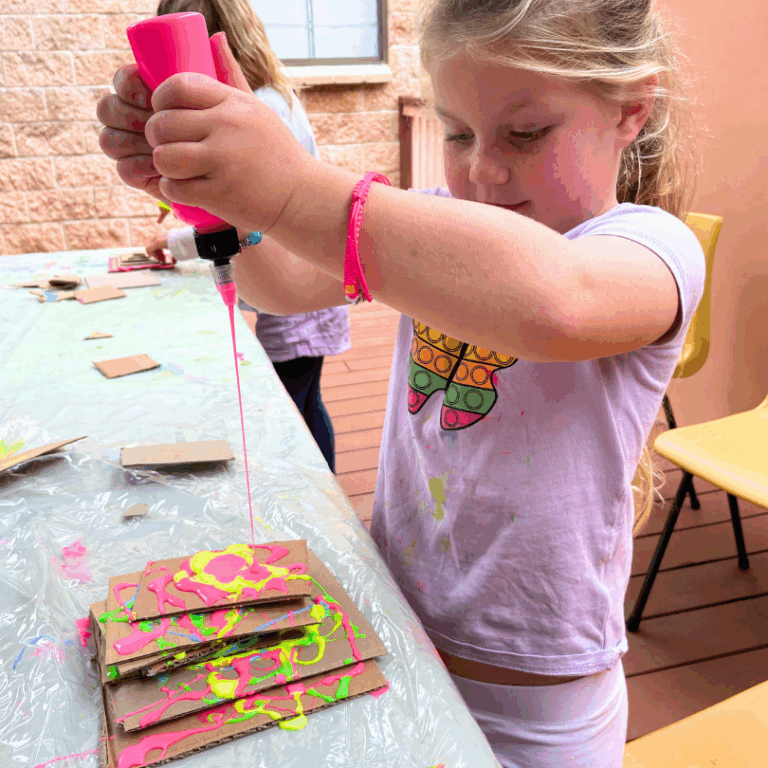
Applicator Bottles: Empty glue bottles or squeeze bottles are ideal for dispensing the paint-infused glue. This allows for precise application and controlled lines.
Protective Covering: A plastic tray or drop cloth is essential to contain the mess and protect your workspace. This project is delightfully messy, so preparation is key!
Optional: Glitter, Sequins, or Other Embellishments: For an extra touch of sparkle and texture, consider adding glitter, sequins, or other embellishments to your sculptures.
Step-by-Step Guide to Building Glowing Sculptures
Follow these simple steps to guide your young artists through the process of creating their own glowing cardboard sculptures:
- Prepare the Cardboard: Begin by pre-cutting a variety of cardboard shapes and sizes. This will make it easier for children to focus on building and creating without struggling with cutting.
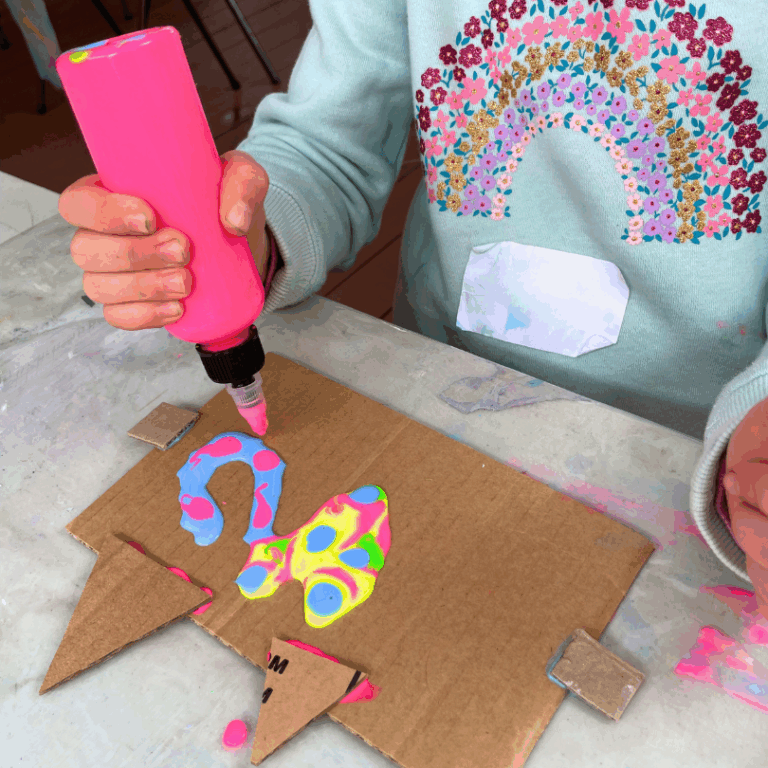
- Mix Paint and Glue: In separate containers, combine a small amount of neon paint with white school glue. Mix thoroughly until the paint is evenly distributed throughout the glue. A little paint goes a long way, so start with a small amount and add more as needed.
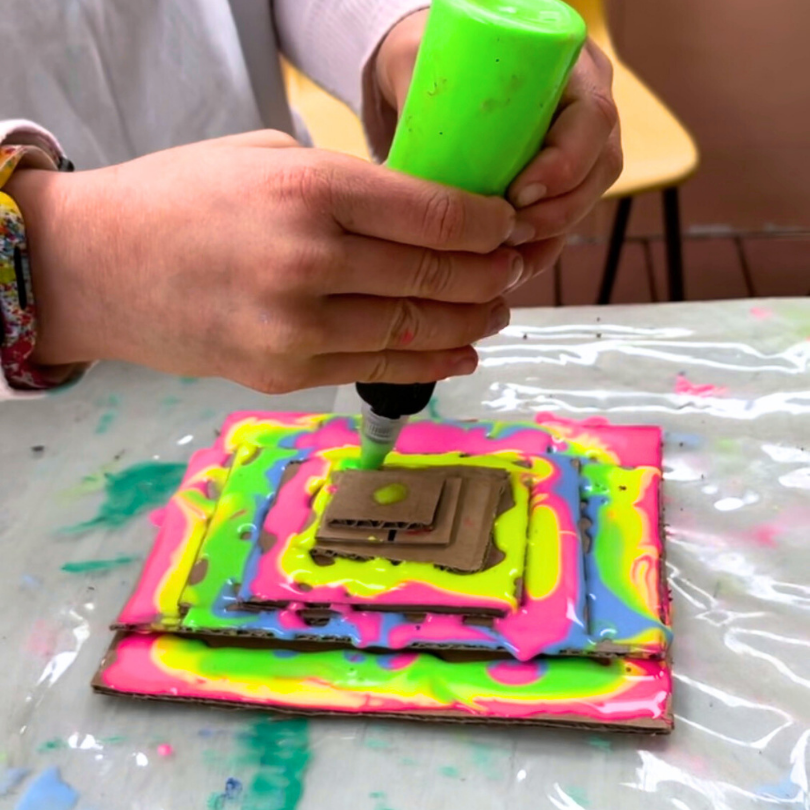
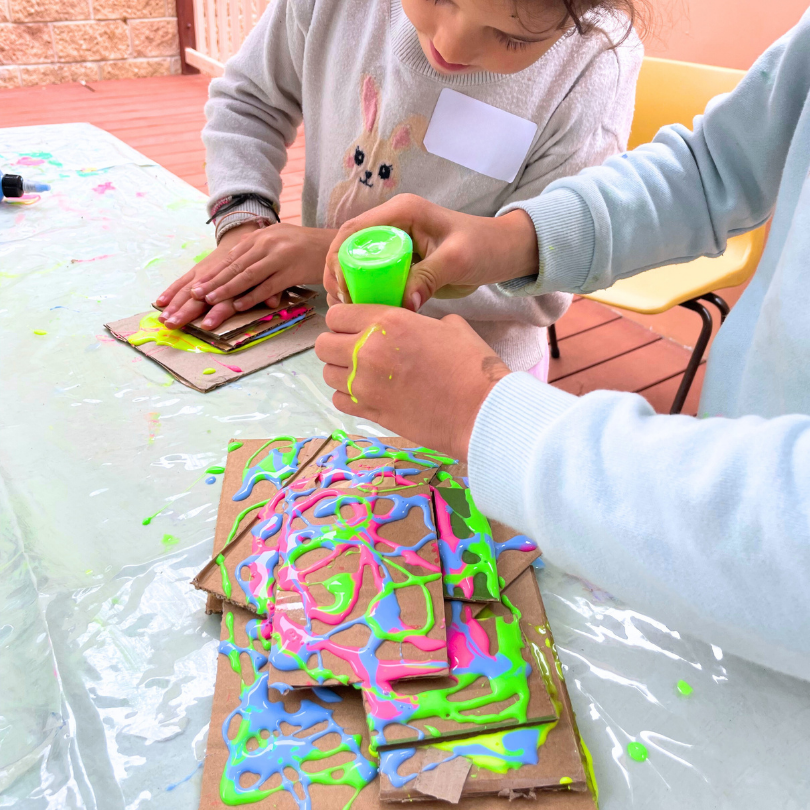
- Building Time: Encourage children to experiment with different ways of connecting the cardboard pieces using the paint-infused glue. They can layer, stack, and arrange the pieces to create unique sculptures.
- Embrace the Mess: This project is all about process and exploration, so don’t worry about perfection. Encourage children to embrace the mess and have fun with the materials.
- Add Embellishments (Optional): Once the sculptures are complete, children can add glitter, sequins, or other embellishments to further enhance their creations.
Expanding the Creative Possibilities
This project offers endless opportunities for customization and expansion. Here are a few ideas to inspire further exploration:
Themed Sculptures: Encourage children to create sculptures based on a specific theme, such as animals, buildings, or fantastical creatures.
Collaborative Sculptures: Have children work together to create a large-scale collaborative sculpture.
Light Integration: Incorporate battery-operated LED lights into the sculptures to create glowing, illuminated artworks.
Mixed Media: Combine cardboard with other materials, such as paper, fabric, or found objects, to create mixed-media sculptures.
For more inspiring art projects and creative ideas, explore our resources on TheTrendyType.com/art-projects. And if you’re looking for high-quality art supplies, be sure to check out our selection of TheTrendyType.to/41rLK8J glue and other essential materials.
Unleash Creativity: Cardboard Sculpting for Kids
Looking for a captivating and open-ended art activity that will keep kids engaged for hours? Cardboard sculpting is a fantastic way to foster imagination, problem-solving skills, and artistic expression. This project isn’t about achieving a perfect outcome; it’s about the joy of the creative process and allowing children to explore their ideas freely. In a world increasingly focused on structured activities, providing opportunities for unstructured play like this is more important than ever. Studies show that open-ended play boosts cognitive development and encourages innovation.
Why Cardboard is the Perfect Sculpting Medium
Cardboard offers a unique blend of accessibility, affordability, and versatility. Unlike clay or other traditional sculpting materials, cardboard is readily available (think shipping boxes, cereal boxes, and even toilet paper rolls!). It’s lightweight, easy to cut and manipulate, and provides a surprisingly sturdy base for building three-dimensional creations. Plus, it’s a sustainable material, making it an eco-friendly art option. According to a recent survey, 78% of parents are actively seeking more sustainable craft options for their children.
Getting Started: Materials & Preparation
The beauty of this project lies in its simplicity. Here’s what you’ll need:
Cardboard: A variety of sizes and thicknesses is ideal.
Glue: Non-toxic glue, such as a white school glue or a neon-colored craft glue, works best.
Scissors or Craft Knives: (Adult supervision required for younger children).
Optional: Paint, markers, glitter, or other embellishments to add color and detail.
Before you begin, gather your materials and cover your work surface to protect it from glue and paint. Encourage children to collect and save cardboard boxes in the weeks leading up to the project – this adds to the excitement and promotes resourcefulness.
Building the Sculptures: A Step-by-Step Guide
- Stack, Layer, and Connect: Let kids begin by stacking, layering, and connecting cardboard pieces using glue. Encourage them to experiment with different shapes and sizes. There’s no right or wrong way to build!
- Embrace the Mess: Don’t be afraid to get messy! Squeezing glue all over the creations is part of the fun. The more texture and dimension, the better.
- Add Details & Embellishments: Once the basic structure is in place, children can add details and embellishments using paint, markers, glitter, or other materials. This is where their individual creativity truly shines.
- Let it Dry: Allow the sculptures to dry completely. As the glue sets, the cardboard will harden, creating colorful and structural artworks. Drying time will vary depending on the amount of glue used and the humidity levels.
The Power of Process-Based Art
This project isn’t about creating a specific outcome; it’s about the journey of exploration and discovery. Encourage children to focus on the process of building and creating, rather than striving for perfection. This approach fosters self-confidence, problem-solving skills, and a love of art. It also allows for endless possibilities and encourages children to think outside the box. If your child is interested in more building projects, check out our guide to cardboard building discs.
Beyond Cardboard: Expanding the Sculptural Experience
Looking for more sculptural adventures? Here are a few ideas to inspire your little artists:
Easy Wood Sculptures for Kids: Explore the natural beauty of wood with simple carving and painting projects. Find inspiration at our wood sculpture guide.
Painted Wood Blocks: Create colorful and engaging building blocks for hours of imaginative play. Learn how to make them at this tutorial on painted wood blocks.
Wire Sculptures: Introduce children to the world of 3D art with wire, buttons, beads, and feathers.
Rainbow Cardboard Sculptures: Build a vibrant and whimsical rainbow sculpture using cardboard and paint.
* Colorful Cardboard Creations: Explore a variety of cardboard sculpting techniques and create unique and colorful artworks.
Unleash Creativity: Vibrant Cardboard Sculptures for Budding Artists
Cardboard, often relegated to the recycling bin, possesses remarkable potential as an artistic medium. It’s readily available, inexpensive, and surprisingly versatile, making it an ideal material for children’s art projects. Beyond simple construction, cardboard can be transformed into captivating, three-dimensional sculptures bursting with color and personality. This guide explores how to create stunning neon cardboard sculptures, fostering imagination and artistic skill in kids of all ages.
Why Cardboard Sculptures are a Fantastic Creative Outlet
In an increasingly digital world, hands-on art experiences are more crucial than ever. Building cardboard sculptures encourages problem-solving, spatial reasoning, and fine motor skill development. Unlike pre-made kits, working with cardboard allows for complete creative freedom. Children can design and construct anything they imagine, from fantastical creatures to miniature cityscapes. According to a recent study by the National Art Education Association, children who regularly participate in hands-on art activities demonstrate improved cognitive abilities and emotional expression.
The Benefits Extend Beyond Artistic Skill
The process of creating these sculptures isn’t just about the finished product. It’s about the journey of experimentation, adaptation, and perseverance. Children learn to overcome challenges, such as figuring out how to support a structure or attach different pieces. This builds confidence and resilience, valuable life skills that extend far beyond the art table. Plus, using recycled materials promotes environmental awareness and teaches children the importance of sustainability. If you’re looking for more ways to encourage eco-friendly art, check out our guide to eco-friendly art supplies.
Gathering Your Materials: A Simple Supply List
The beauty of this project lies in its simplicity. You won’t need expensive or specialized tools. Here’s what you’ll need to get started:
Cardboard: A variety of sizes and thicknesses is ideal. Cereal boxes, shipping boxes, and even toilet paper rolls can be used.
Neon Acrylic Paint: Bright, vibrant colors are key to achieving the desired effect.
Paintbrushes: A range of sizes will allow for detailed work and broad coverage.
Scissors & Craft Knife (Adult Supervision Required): For cutting and shaping the cardboard.
Glue Gun or Strong Craft Glue: To securely attach the pieces. A glue gun is faster, but adult supervision is essential.
Ruler & Pencil: For measuring and marking.
Optional: Glitter, sequins, or other embellishments: To add extra sparkle and personality.
Step-by-Step Guide to Building Neon Cardboard Creations
- Design & Planning: Encourage your child to sketch out their sculpture idea. This helps them visualize the final product and plan the necessary pieces. Consider starting with a simple shape, like an animal or a geometric form, for younger children.
- Cutting the Cardboard: Carefully cut out the cardboard pieces according to the design. Adults should handle the craft knife, while children can use scissors for simpler cuts.
- Assembling the Structure: Use the glue gun or craft glue to attach the cardboard pieces together, building the basic structure of the sculpture. Hold the pieces in place until the glue sets.
- Painting with Neon: Once the structure is stable, it’s time to unleash the neon! Apply several coats of acrylic paint, allowing each coat to dry before applying the next. Experiment with different color combinations and techniques to create a vibrant, eye-catching effect.
- Adding Embellishments (Optional): Once the paint is dry, add glitter, sequins, or other embellishments to further enhance the sculpture.
Inspiring Ideas for Cardboard Sculptures
The possibilities are endless! Here are a few ideas to get you started:
Mythical Creatures: Dragons, unicorns, and griffins are always popular choices.
Architectural Wonders: Recreate famous landmarks or design your own futuristic city.
Abstract Forms: Encourage experimentation with shapes and colors to create unique abstract sculptures.
Robot Creations: Build a futuristic robot with moving parts and intricate details.
Animal Kingdom: From playful puppies to majestic lions, the animal kingdom provides endless inspiration.
For more creative project ideas, explore our collection of kids’ art projects.
Safety First: Important Considerations
While this project is fun and engaging, safety should always be a priority.
Adult Supervision: Adults should supervise children when using scissors, craft knives, and glue guns.
Sharp Edges: Be mindful of sharp edges on the cardboard and take steps to cover or smooth them.
Ventilation: Ensure adequate ventilation when using paint and glue.
Non-Toxic Materials: Use non-toxic paints and glues, especially for younger children.