
Creative Easter Egg Dyeing: A Shaving Cream Marbling Technique
Looking for a fresh and exciting way to decorate Easter eggs this year? Move beyond traditional dyeing methods and embrace the mesmerizing beauty of shaving cream marbling! Here at TheTrendyType, we’re always exploring innovative craft ideas, and this technique quickly became a favorite. We’ve previously shared tutorials on creating stunning eggs with various decorating methods, experimented with Kool-Aid marbling, and even explored the artistry of wax resist dyeing. But the unique, swirling patterns achieved with shaving cream truly stand out.
Why Shaving Cream Marbling?
Table of Contents
- Why Shaving Cream Marbling?
- Materials You’ll Need
- Step-by-Step Guide to Marbled Easter Eggs
- 1. Prepare Your Workspace
- 2. Create the Shaving Cream Base
- 3. Add the Color
- 4. Swirl and Blend
- 5. Roll the Eggs
- 6. Remove and Dry
- 7. Rinse and Admire
- Tips for Success
- Elevate Your Easter Decor: A Guide to Marbled Eggs
- What You’ll Need to Get Started
- Preparing the Marbling Medium
- The Marbling Process: Transforming Eggs into Art
- Tips for Stunning Results
- Displaying Your Masterpieces
- Why Shaving Cream for Easter Eggs?
- Materials You’ll Need
- Step-by-Step Guide to Marbled Easter Eggs
- Tips for Stunning Results
- Beyond the Basics: Expanding Your Easter Creativity
- The Joy of Easter Creativity
This method offers a delightful blend of artistry and simplicity, perfect for all ages. It’s a fantastic way to introduce children to the concept of color blending and pattern creation, while also resulting in beautifully unique Easter eggs. Plus, the process is surprisingly easy and requires minimal materials. In 2024, searches for “DIY Easter egg decorating” increased by 35% according to Google Trends, demonstrating a growing interest in personalized, handmade crafts.
Materials You’ll Need
Before you begin, gather the following supplies:
Hard-boiled eggs (cooled completely)
Foam shaving cream (avoid gel formulas)
Food coloring or liquid watercolors (we recommend gel food coloring for more vibrant results)
Shallow dish or tray (disposable is easiest for cleanup)
Spoon or stirring stick
Toothpicks or skewers (optional, for creating intricate designs)
Paper towels or old newspapers (for protecting your work surface and cleaning up spills)
Step-by-Step Guide to Marbled Easter Eggs
1. Prepare Your Workspace
Cover your work surface with newspapers or an old tablecloth to protect it from stray shaving cream and food coloring. This will make cleanup a breeze!
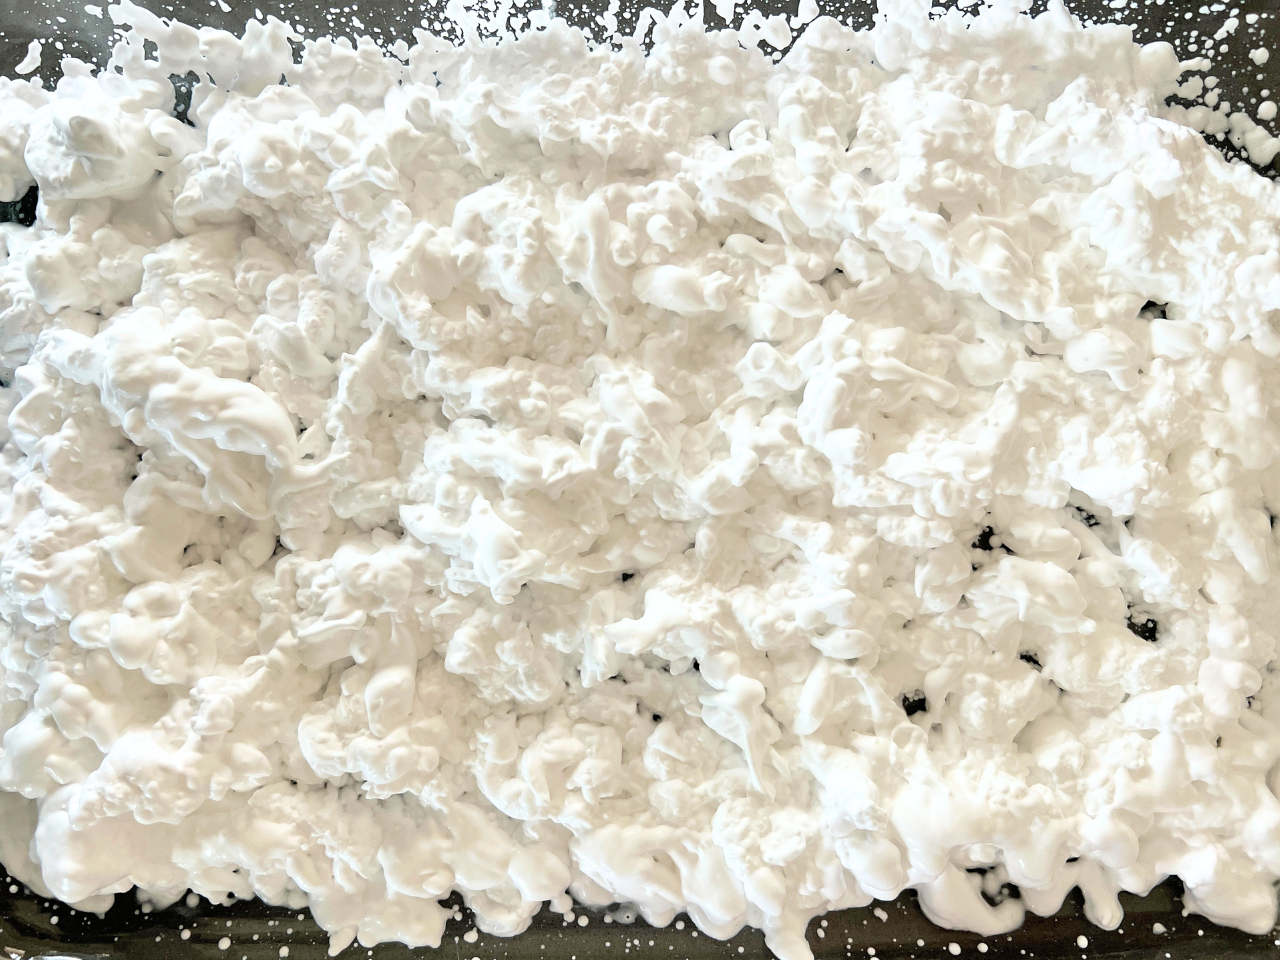
2. Create the Shaving Cream Base
Spread a generous layer of shaving cream evenly across the bottom of your shallow dish. Aim for a thickness of about ½ inch to 1 inch. The shaving cream acts as your canvas for the marbling effect.
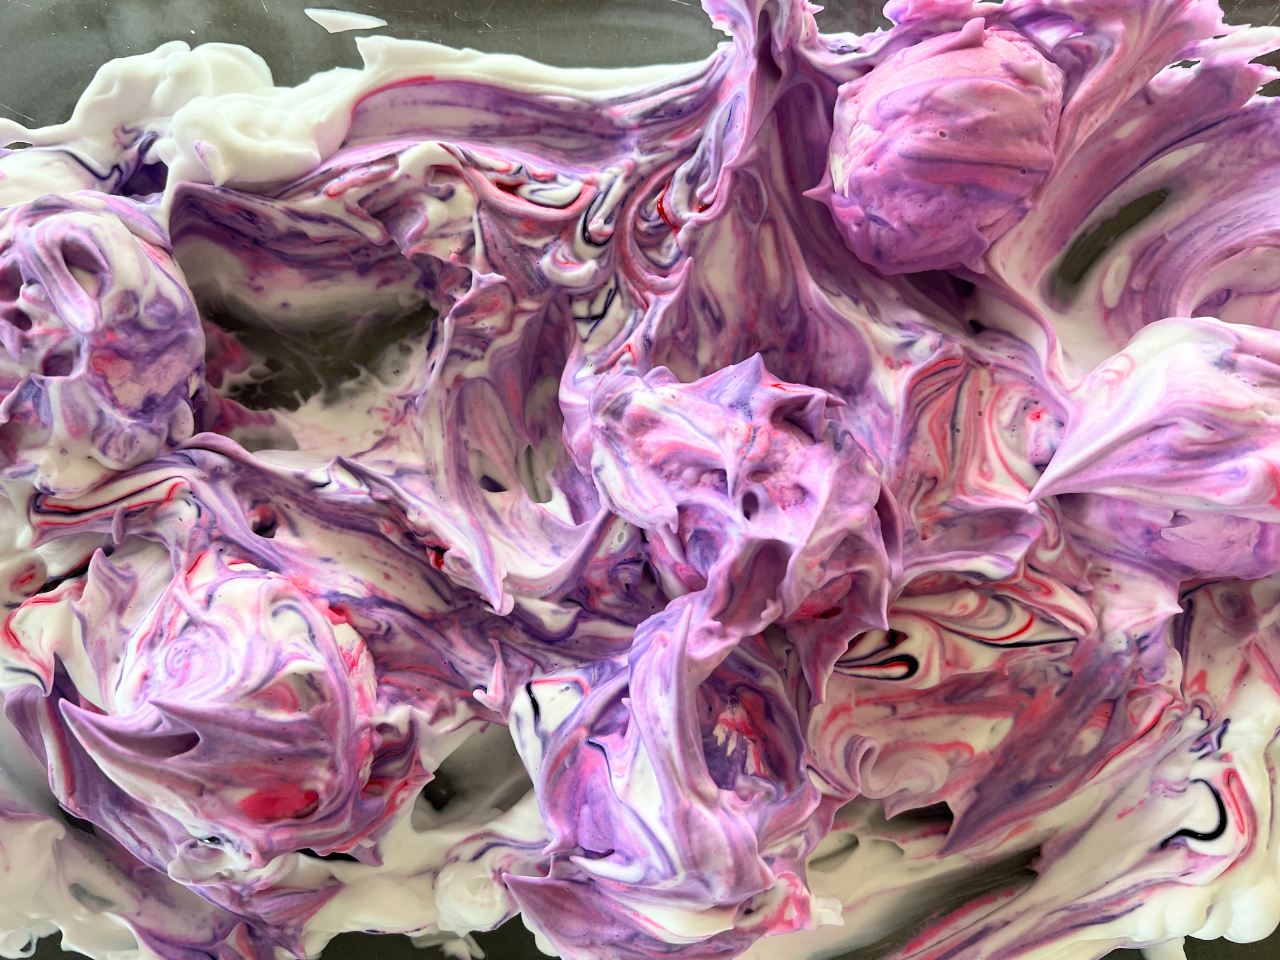
3. Add the Color
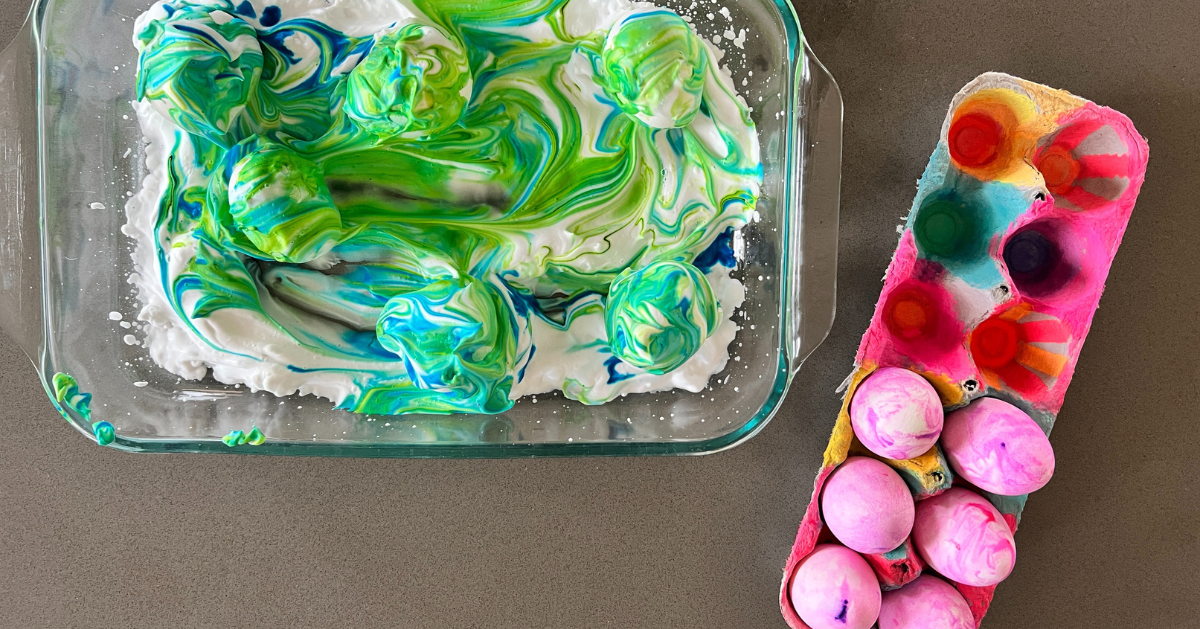
Drizzle drops of food coloring or liquid watercolors onto the surface of the shaving cream. Experiment with different colors and quantities to achieve your desired look. Don’t be afraid to get creative!
4. Swirl and Blend
Using a spoon, toothpick, or skewer, gently swirl the food coloring into the shaving cream. Create patterns, blend colors, and experiment with different techniques. The goal is to create a marbled effect with swirling colors. For more advanced designs, try dragging the toothpick through the shaving cream in specific patterns.
5. Roll the Eggs
Carefully roll the hard-boiled eggs through the colored shaving cream, ensuring they are fully coated. You can roll them in one direction or gently rotate them to pick up the colors from all sides.
6. Remove and Dry
Using a spoon or your fingers (wearing gloves is recommended), carefully remove the eggs from the shaving cream. Place them on a wire rack or paper towel-lined tray to dry.
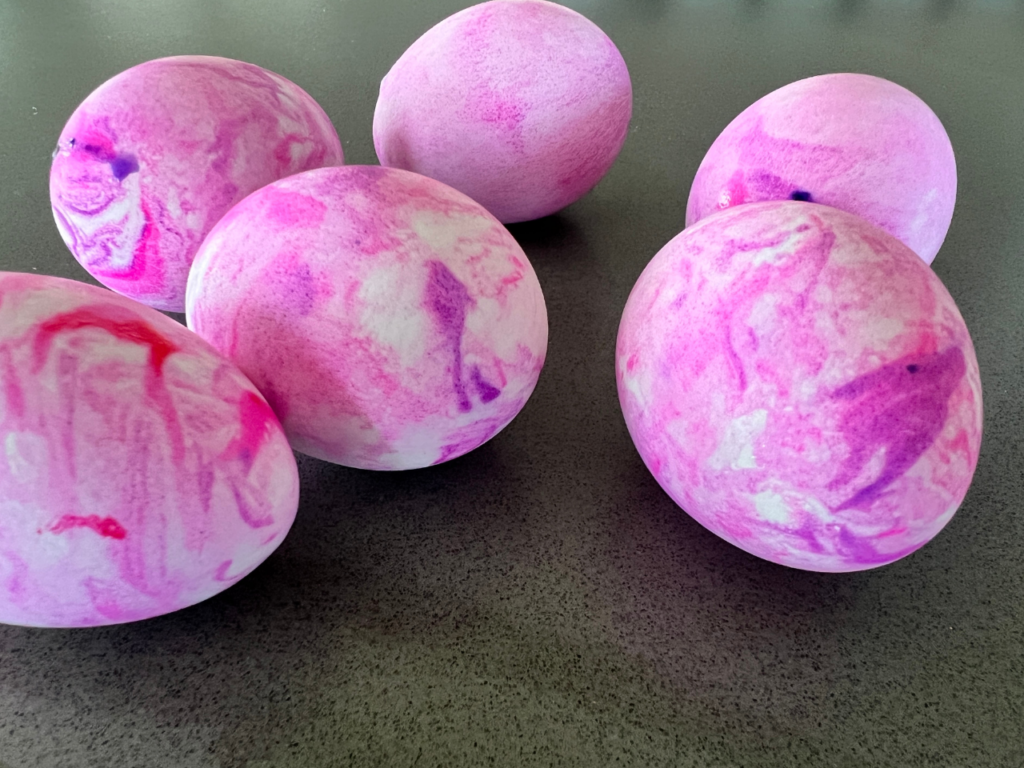
7. Rinse and Admire
Once the eggs are dry (approximately 30-60 minutes), gently rinse them under cool water to remove any excess shaving cream. Be careful not to rub too hard, as this could remove some of the color. Pat them dry with a paper towel and admire your beautifully marbled Easter eggs!
Tips for Success
Use foam shaving cream: Gel formulas won’t create the desired marbling effect.
Experiment with colors: Try different combinations to create unique and vibrant designs.
Don’t over-swirl: Too much swirling can muddy the colors.
Work quickly: The shaving cream will start to dissolve over time.
Protect your hands: Wearing gloves can prevent staining.
Looking for more creative Easter ideas? Check out our guide to easy Easter crafts for kids!
Elevate Your Easter Decor: A Guide to Marbled Eggs
Looking for a unique and captivating Easter activity that results in stunning decorations? Forget traditional egg dyeing and embrace the mesmerizing technique of marbled eggs! This project is surprisingly simple, incredibly fun for all ages, and yields beautifully patterned eggs perfect for displaying or hiding. It’s a fantastic way to add a touch of artistry to your spring celebrations and create memorable family moments. If you’re looking for more creative Easter ideas, explore our guide to DIY Easter Crafts for inspiration.
What You’ll Need to Get Started
Before diving into the creative process, gather these essential supplies:
Hard-Boiled Eggs: The foundation of your masterpiece! Ensure they are completely cooled before handling.
Shaving Cream: Foamy, inexpensive shaving cream (not gel) works best. A large can is recommended for ample coverage.
Food Coloring or Liquid Watercolors: Choose vibrant colors for a striking effect. Liquid watercolors offer more intense pigmentation.
Shallow Dish or Tray: A disposable aluminum tray or a shallow baking dish is ideal.
Toothpicks or Skewers: For swirling and creating intricate patterns.
Paper Towels: For wiping away excess shaving cream.
Optional: Gloves: To keep hands dye-free.
Preparing the Marbling Medium
- Create the Base: Spread a generous, thick layer of shaving cream evenly across the surface of your shallow dish. The thicker the layer, the more vibrant the marbling will be.
- Add Color & Swirl: Drip or squirt drops of food coloring or liquid watercolors randomly over the shaving cream. Don’t be afraid to experiment with different color combinations! Using a toothpick or skewer, gently swirl the colors into the shaving cream, creating a marbled effect. Encourage creativity – zigzags, spirals, or abstract patterns all work beautifully. Avoid overmixing, as this can muddy the colors.
The Marbling Process: Transforming Eggs into Art
- Gently Roll: Carefully roll a hard-boiled egg across the surface of the shaving cream, ensuring it’s fully coated with the marbled colors. A gentle, even roll is key to achieving a consistent pattern.
- Let it Sit: Allow the egg to rest in the shaving cream for 5-10 minutes. This allows the dye to adhere to the eggshell. Longer soaking times can result in more vibrant colors, but be mindful of potential smudging.
- Remove & Rinse: Gently lift the egg from the shaving cream and rinse it under cool water. Avoid rubbing the egg, as this can remove the marbled pattern.
- Wipe & Dry: Use a paper towel or a dry cloth to carefully wipe away any remaining shaving cream. Place the eggs on a clean, dry surface (an egg carton works well) to air dry completely. Avoid touching the eggs until they are fully dry to prevent smudging.
Tips for Stunning Results
Color Intensity: We discovered that certain colors, like neon pink, tend to be brighter than others. If you find some colors are less vibrant, consider applying a second coat using a dropper or brush.
Experiment with Techniques: Try different swirling patterns and rolling techniques to create unique designs.
Embrace Imperfection: The beauty of marbled eggs lies in their unique, organic patterns. Don’t strive for perfection – embrace the imperfections!
* Safety First: While this project is generally safe, supervise young children to prevent them from ingesting shaving cream or food coloring.
Displaying Your Masterpieces
Once the eggs are completely dry, they’re ready to be displayed! Arrange them in a decorative bowl, nestle them in a spring-themed centerpiece, or hide them for a delightful Easter egg hunt. For a truly memorable Easter, consider pairing these marbled eggs with other Spring Decorations to create a festive atmosphere.
Marbled eggs are a fun, creative, and rewarding project that will add a touch of artistry to your Easter celebrations. So gather your supplies, unleash your creativity, and enjoy the process of transforming ordinary eggs into stunning works of art!
Creative Easter Egg Dyeing: A Shaving Cream Swirl Technique
Easter is a time for joyful celebrations, family traditions, and, of course, beautifully decorated eggs! While traditional egg dyeing methods are lovely, why not inject a bit of playful creativity into your Easter preparations this year? This guide will walk you through a unique and surprisingly simple technique: dyeing Easter eggs with shaving cream. It’s a fantastic activity for kids of all ages, offering a mesmerizing marbled effect that’s far more exciting than a solid color.
Why Shaving Cream for Easter Eggs?
Forget messy powders and complicated kits! Using shaving cream as a base for your dye creates a stunning, swirled finish that resembles marble or watercolor. The creamy texture allows the dye to spread and blend organically, resulting in one-of-a-kind eggs every time. Plus, it’s a relatively inexpensive and readily available material, making it a budget-friendly option for your Easter crafts. If you’re looking for more unique Easter activities, explore our collection of 30 Easter Activities for Kids for endless inspiration.
Materials You’ll Need
Before you begin, gather the following supplies:
Hard-boiled eggs (cooled completely)
Shaving cream (foam, not gel)
Food coloring (gel or liquid)
Small bowls or containers
Toothpicks or skewers
Gloves (optional, but recommended to avoid staining hands)
Paper towels for cleanup
Step-by-Step Guide to Marbled Easter Eggs
- Prepare Your Workspace: Cover your work surface with newspaper or a plastic tablecloth to protect it from dye stains.
- Apply Shaving Cream: Spread a generous layer of shaving cream onto a plate or tray. The thicker the layer, the more dramatic the marbling effect will be.
- Add Food Coloring: Drop several drops of food coloring onto the shaving cream. Use a variety of colors for a vibrant, eye-catching design.
- Swirl the Colors: Using a toothpick or skewer, gently swirl the food coloring into the shaving cream. Avoid overmixing; you want to maintain distinct color variations.
- Roll the Eggs: Carefully roll the hard-boiled eggs through the colored shaving cream, ensuring they are fully coated.
- Let it Sit: Allow the eggs to sit in the shaving cream for 5-10 minutes. The longer they sit, the more intense the color will be.
- Rinse and Dry: Gently rinse the eggs under cool water, removing all traces of shaving cream. Pat them dry with a paper towel.
- Admire Your Creations: Marvel at your beautifully marbled Easter eggs!
Tips for Stunning Results
Gel Food Coloring: Gel food coloring provides more vibrant and concentrated color than liquid food coloring.
Experiment with Colors: Don’t be afraid to mix and match colors! Try complementary colors for a striking contrast or analogous colors for a harmonious blend.
Create Patterns: Use a toothpick or skewer to create intricate patterns in the shaving cream before rolling the eggs.
Vary the Time: Experiment with different sitting times to achieve varying levels of color intensity.
Safety First: While this activity is generally safe, supervise young children to prevent them from ingesting the shaving cream or food coloring.
Beyond the Basics: Expanding Your Easter Creativity
Looking for more ways to elevate your Easter egg decorating game? Consider these ideas:
Nature-Inspired Designs: Incorporate natural elements like leaves, flowers, or twigs to create unique patterns on your eggs. Check out our guide to 5 Easter Egg Decorating Ideas Inspired by Nature for inspiration.
Artistic Egg Decorating: Use paint, markers, or glitter to create intricate designs on your eggs.
Egg Hunts and Displays: Hide your decorated eggs around the yard for a fun Easter egg hunt or create a beautiful Easter egg display.
Explore More Crafts: Dive into our collection of 11 Fun Easter Egg Ideas for even more creative inspiration.

The Joy of Easter Creativity
Dyeing Easter eggs with shaving cream is a fun, easy, and rewarding activity for the whole family. It’s a great way to unleash your creativity, create beautiful decorations, and make lasting memories. So, gather your supplies, embrace the mess, and enjoy the joy of Easter creativity!