Bring Spring Indoors: Creating a Charming Easter Egg Tree
Table of Contents
- Bring Spring Indoors: Creating a Charming Easter Egg Tree
- Why Choose an Easter Egg Tree?
- Crafting Your Easter Egg Tree: A Step-by-Step Guide
- Budget-Friendly Alternatives & Tips
- Hopping into Creativity: 8 Easter Arts & Crafts for Kids
- 1. Pastel Egg Decorating with Natural Dyes
- 2. Bunny Masks: A Hopping Good Time
- 3. Easter Egg Tree: Branching Out with Creativity
- 4. Chick Handprints: A Sweet and Simple Craft
- 5. Easter-Themed Sensory Bins: Engaging Little Explorers
- 6. Paper Plate Bunnies: Hopping with Paper Crafts
- 7. Easter Egg Mosaic Art: A Colorful Challenge
- 8. Painted Rock Easter Eggs: A Natural Easter Decoration
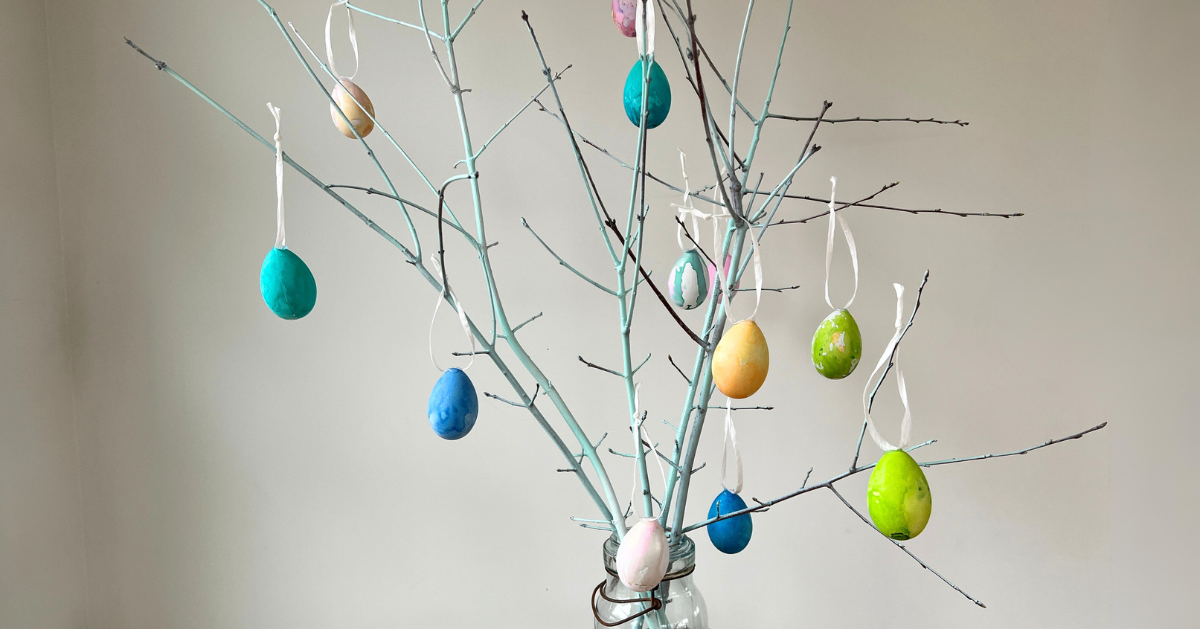
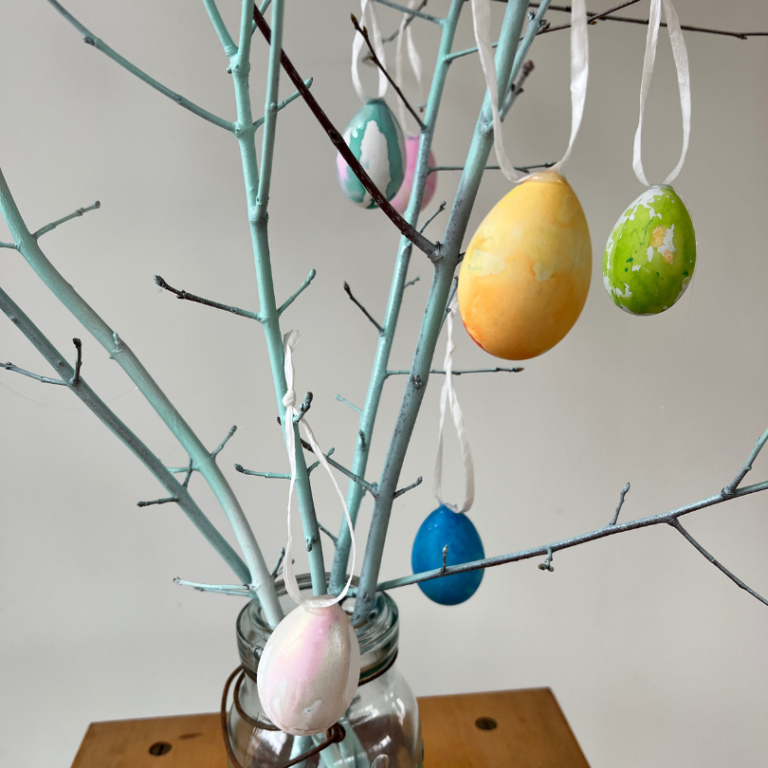
Looking for a unique and delightful way to showcase your beautifully decorated Easter eggs? An Easter egg tree is a festive and eye-catching display that adds a touch of springtime magic to any home. It’s more than just decoration; it’s a wonderful family activity that encourages creativity and brings a cheerful ambiance to your living space.
This project is a beloved tradition at TheTrendyType, inspired by founder Jean’s cherished memories of crafting them with her daughters. We found it to be a surprisingly simple yet impactful way to celebrate the season, and we’re excited to share how you can create your own stunning display.

Why Choose an Easter Egg Tree?
Beyond its visual appeal, an Easter egg tree offers several benefits. It’s a fantastic way to repurpose the colorful eggs created during Easter egg decorating sessions. It also serves as a beautiful centerpiece for your dining table or a whimsical addition to a mantelpiece. Plus, the process of creating the tree together fosters bonding and provides a memorable experience for the whole family. If you’re looking for more Easter fun, explore our guide to creative Easter crafts for all ages!
Crafting Your Easter Egg Tree: A Step-by-Step Guide
Creating an Easter egg tree is surprisingly straightforward. Here’s a breakdown of the materials you’ll need and the steps to follow:
Materials:
Several tree branches (foraged or purchased)
A plant pot or mason jar
Sand, pebbles, or dirt to anchor the branches
Hollow, decorated Easter eggs
Ribbon or yarn for hanging the eggs
Hot glue gun (optional, for extra security)
Instructions:
- Prepare the Base: Place sand, pebbles, or dirt into the plant pot or mason jar. This will provide a stable base for your branches.
- Arrange the Branches: Carefully insert the tree branches into the base, arranging them to create a visually appealing tree shape. Ensure the branches are secure and won’t topple over.
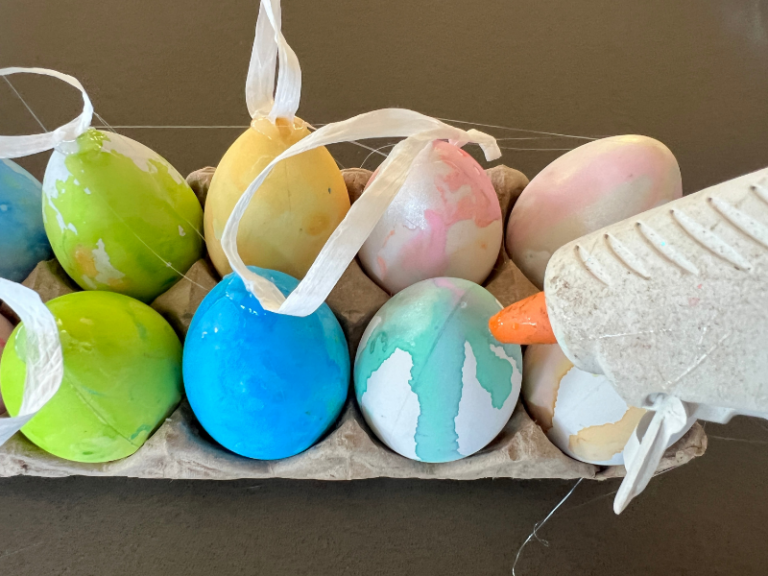
- Prepare the Eggs: Cut lengths of ribbon or yarn. Tie each length around an egg, creating a loop for hanging.
- Hang the Eggs: Gently hang the decorated eggs from the branches, distributing them evenly to create a balanced look. You can use the hot glue gun to secure the ribbon to the branches for added stability, if desired.
- Display and Enjoy: Place your finished Easter egg tree in a prominent location and enjoy the cheerful springtime display!
Budget-Friendly Alternatives & Tips
With the rising cost of eggs this year, many families are seeking affordable alternatives. Consider using dyeable plastic eggs – available for as little as $1.98 per dozen at retailers like Walmart – as a reusable and budget-friendly option. These plastic eggs can be decorated just like traditional eggs and will last for years to come.
For a more natural look, forage for interesting branches in your backyard or local park. Just be sure to check local regulations before collecting any branches. If you’re looking for more ways to save this Easter, check out our tips for hosting an Easter celebration on a budget!
By following these simple steps, you can create a charming and festive Easter egg tree that will bring joy to your home for years to come.## Elevate Your Easter Decor: Creating a Stunning Easter Egg Tree
Looking for a fresh and imaginative way to showcase your beautifully decorated Easter eggs? Forget traditional baskets and displays – this year, bring the outdoors in with a captivating Easter egg tree! This project is wonderfully simple, incredibly charming, and offers a unique focal point for your Easter celebrations. It’s a fantastic activity to enjoy with the whole family, and the resulting display is sure to impress.
### Gathering Your Natural Foundation
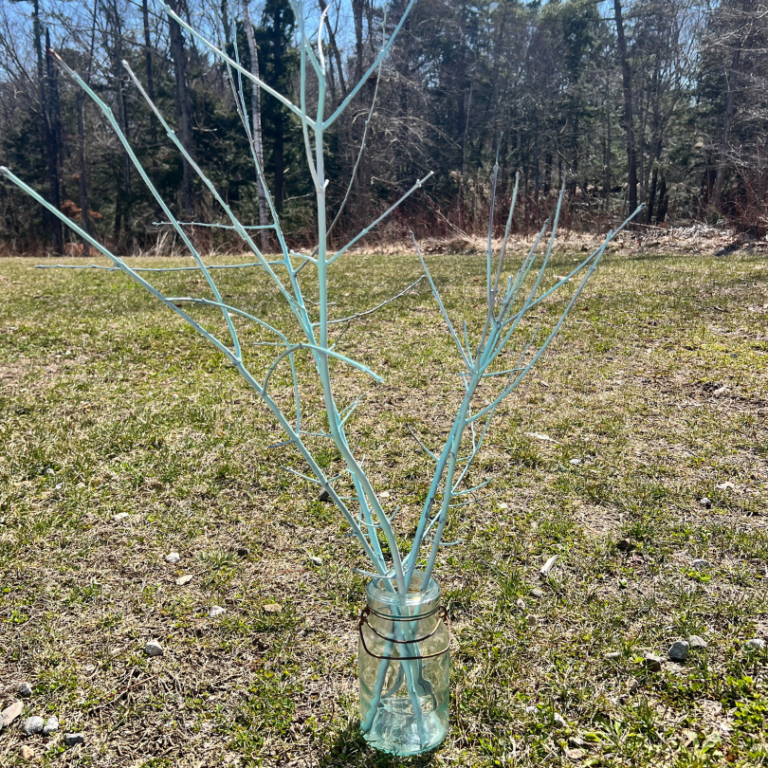
The first step in creating your Easter egg tree is sourcing the “branches” themselves. A leisurely nature walk is the perfect opportunity to gather fallen branches – look for pieces with multiple stems to provide ample hanging space. Alternatively, you can utilize branches from your own backyard. The beauty of this project lies in its organic aesthetic, so don’t worry about perfectly symmetrical branches.
Once you’ve collected your branches, consider enhancing their appearance. While leaving them natural offers a rustic charm, a light coat of spray paint can add a touch of elegance. White is a classic choice, but feel free to experiment with pastel shades or even metallic tones to complement your Easter color scheme. Secure your branch(es) within a sturdy pot or mason jar. To ensure stability, fill the container with rocks, sand, or potting soil.
### Preparing Your Eggs for Display
Now comes the fun part – preparing your decorated eggs to hang! This requires a simple addition: a ribbon or yarn loop. Using a low-temperature glue gun, carefully attach a loop of ribbon or yarn to the top of each egg. Ensure the glue is fully cooled before handling the eggs to prevent any mishaps. For a more sophisticated look, consider using ribbons that coordinate with your Easter color palette or feature delicate patterns. If you’re looking for inspiration on egg decorating techniques, explore our guide to Easter Egg Decorating Ideas Inspired by Nature for some beautiful and creative ideas.
### Assembling Your Easter Masterpiece
With your branches secured and eggs prepared, it’s time to assemble your Easter egg tree! Gently hang your decorated eggs from the branches, distributing them evenly to create a balanced and visually appealing display. Step back and admire your creation! This unique centerpiece is sure to become a cherished tradition for years to come.
This project is incredibly rewarding and offers a delightful alternative to traditional Easter displays. We highly recommend trying this simple yet stunning way to showcase your decorated eggs this Easter!
### More Easter Fun for Kids
Looking for even more Easter-themed crafts and activities? Check out these fantastic ideas:
* 11 Fun Ideas for Decorating Easter Eggs
* 30 Easter Activities for Kids
* 10 Easter Craft Ideas for Kids
* How to Make Paper Mâché Easter Eggs
* 8 Adorable Easter Bunny Crafts for Kids
Hopping into Creativity: 8 Easter Arts & Crafts for Kids
Easter is a time for joy, family, and, of course, creativity! Beyond the egg hunts and chocolate bunnies, engaging kids in arts and crafts is a fantastic way to celebrate the season and foster their imagination. This year, ditch the store-bought decorations and embrace the fun of handmade creations. Here are eight delightful Easter arts and crafts ideas to keep your little ones entertained and inspired.
1. Pastel Egg Decorating with Natural Dyes
Forget harsh chemical dyes! This Easter, introduce your children to the beauty of natural dyes. Using ingredients like beets (for pink), spinach (for green), and blueberries (for blue), you can create stunning pastel-colored eggs. This is a wonderful opportunity to teach them about where colors come from and the magic of nature. Boil eggs as usual, then let the dyeing process begin! For a unique touch, try adding pressed flowers or leaves before sealing with a clear varnish. Looking for more egg-cellent ideas? Explore our guide to Easter egg decorating techniques for inspiration.
2. Bunny Masks: A Hopping Good Time
What’s Easter without a bunny? Help your kids transform into adorable bunnies with simple paper plate masks. Cut out eye holes, add construction paper ears, a fluffy cotton ball tail, and let them decorate with markers, glitter, and paint. These masks are perfect for Easter parades, storytelling, or simply imaginative play.
3. Easter Egg Tree: Branching Out with Creativity
Bring the outdoors in with a charming Easter egg tree. Gather branches from your yard (or use a decorative branch from a craft store) and place them in a vase. Let your children decorate plastic or real (blown-out) eggs and hang them from the branches using ribbon or string. This creates a beautiful centerpiece and a delightful alternative to a traditional Easter basket. For a more detailed tutorial, check out our article on How to Make an Easter Egg Tree.
4. Chick Handprints: A Sweet and Simple Craft
This craft is perfect for even the youngest artists. Dip your child’s hand in yellow paint and press it onto paper to create a cute chick shape. Add googly eyes, an orange beak, and tiny feet to complete the adorable creation. This is a wonderful keepsake and a fun way to capture their little handprints.
5. Easter-Themed Sensory Bins: Engaging Little Explorers
Sensory bins are a fantastic way to engage young children’s senses and encourage exploration. Fill a bin with Easter-themed items like plastic eggs, colorful pom-poms, shredded paper grass, and small toys. Hide treasures within the bin for them to discover, promoting tactile learning and imaginative play.
6. Paper Plate Bunnies: Hopping with Paper Crafts
Paper plates are a versatile craft supply! Help your children transform them into adorable bunnies by folding them in half, adding construction paper ears, a fluffy cotton ball tail, and drawing on a cute face. These bunnies can be hung as decorations or used for imaginative play.
7. Easter Egg Mosaic Art: A Colorful Challenge
For older children, mosaic art is a fun and challenging craft. Provide them with small pieces of colored paper, tissue paper, or even broken eggshells (cleaned and dried) and let them create colorful mosaic designs on cardboard or paper plates. This encourages creativity, fine motor skills, and patience.
8. Painted Rock Easter Eggs: A Natural Easter Decoration
Gather smooth rocks from your garden or a local park and let your children paint them to resemble Easter eggs. This is a fun and eco-friendly craft that creates unique and charming Easter decorations. Seal the painted rocks with varnish to protect them from the elements.
Pin It for Later