Creating Enchanting Miniature Worlds: A Guide to Fairy Gardens
Do your children (or the young at heart!) delight in imagining tiny, magical realms? Fairy gardens offer a wonderful outlet for creativity and a connection with nature. These miniature landscapes aren’t just a fleeting trend; they’re a captivating activity that encourages imaginative play and provides a beautiful, personalized touch to any indoor or outdoor space. In 2024, interest in whimsical garden décor is up 30% according to the National Gardening Association, proving the enduring appeal of these enchanting creations.
Why Build a Fairy Garden?
Table of Contents
- Why Build a Fairy Garden?
- Getting Started: Materials You’ll Need
- Building Your Miniature Landscape: A Step-by-Step Guide
- Step 1: Choosing and Preparing Your Container
- Step 2: Laying the Foundation with Plants
- Step 3: Adding Pathways and Borders
- Step 4: Incorporating Whimsical Features
- Step 5: Finishing Touches and Maintenance
- Enchanting Miniature Worlds: Creating Fairy Gardens with Kids
- Why Fairy Gardens are Beneficial for Children
- Gathering Your Materials: A Checklist for Success
- Step-by-Step Guide to Building Your Fairy Garden
- Beyond the Basics: Expanding Your Fairy Garden
- Maintaining Your Enchanted Space
Beyond the sheer fun of crafting a miniature world, fairy gardens offer several benefits. They encourage children to explore their creativity, develop fine motor skills, and learn about plants and nature. For adults, they provide a relaxing and rewarding hobby, a unique garden accent, and a delightful conversation starter. Plus, they’re incredibly adaptable – you can tailor them to any theme, season, or personal preference. If you’re looking for unique garden décor ideas, a fairy garden is a perfect starting point.
Getting Started: Materials You’ll Need
The beauty of fairy gardens is their accessibility. You don’t need a sprawling garden or expensive materials to create something magical. Here’s a list of essentials:
Container: A shallow planter, terracotta pot, broken pot, or even a sturdy tray will work perfectly. Consider a container with drainage holes if you plan to keep your garden outdoors.
Potting Soil: Choose a high-quality potting mix that retains moisture but also provides good drainage.
Natural Elements: Gather moss, small rocks, twigs, pebbles, and dried flowers from your yard or a local park (ensure it’s permissible to collect these items).
Miniature Accessories: This is where your imagination can run wild! Look for tiny houses, figurines, furniture, signs, and other whimsical details. You can find these at craft stores, garden centers, or online. Consider exploring our selection of fairy garden accessories for inspiration.
* Plants: Select small, low-growing plants that will thrive in the conditions of your chosen location. Succulents, mosses, creeping thyme, and miniature ferns are excellent choices.
Building Your Miniature Landscape: A Step-by-Step Guide
Step 1: Choosing and Preparing Your Container
Select a container that suits your space and aesthetic. Ensure it’s clean and, if necessary, has drainage holes. Fill the container with potting soil, leaving about an inch of space at the top. Gently press down on the soil to create a stable base.
Step 2: Laying the Foundation with Plants
Begin by planting your chosen plants. Consider the height and spread of each plant to create a visually appealing landscape. Arrange taller plants towards the back and shorter plants in the front. Don’t be afraid to experiment with different arrangements until you achieve the desired look. Remember to water the plants gently after planting.
Step 3: Adding Pathways and Borders
Use small pebbles, twigs, or moss to create pathways and borders within your garden. These elements add texture and visual interest, guiding the eye through the miniature landscape. You can also use these materials to create miniature walls or fences.
Step 4: Incorporating Whimsical Features
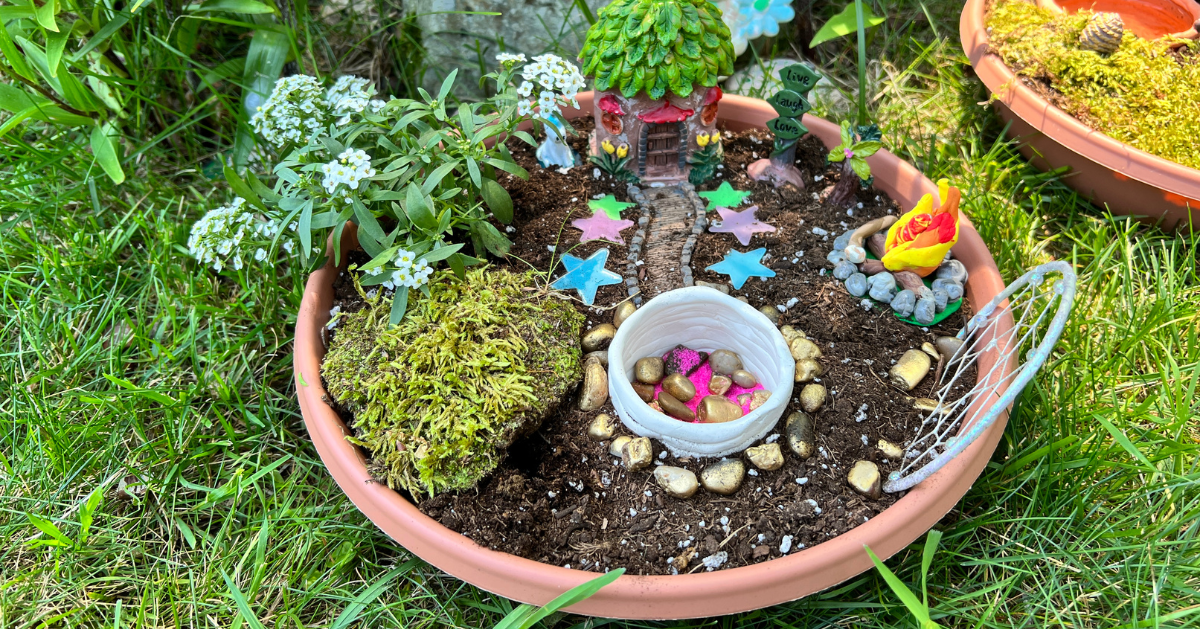
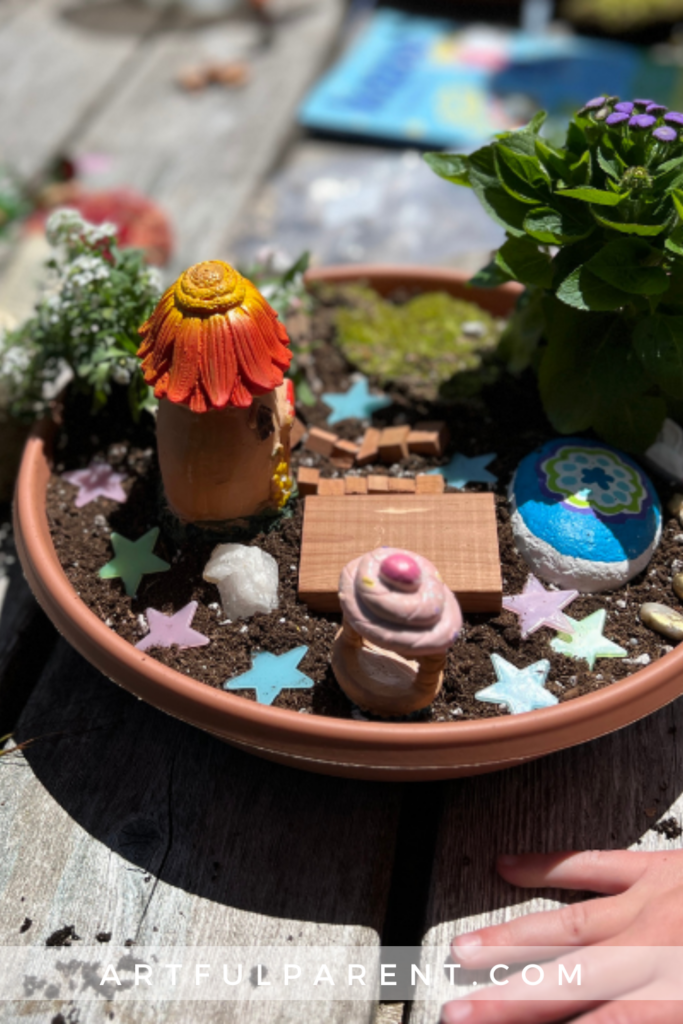
Now comes the fun part! Arrange your miniature houses, figurines, furniture, and other accessories within the garden. Create a scene that tells a story or reflects your imagination. Consider adding a miniature pond, a tiny bridge, or a secret garden.
Step 5: Finishing Touches and Maintenance
Once you’re happy with the arrangement, add any final touches, such as miniature flowers or fairy lights. Water the plants regularly and remove any dead leaves or debris. With a little care, your fairy garden will remain a magical oasis for years to come. For more ideas on creating a magical garden, check out our blog.
Enchanting Miniature Worlds: Creating Fairy Gardens with Kids
Fairy gardens have blossomed in popularity, offering a delightful blend of creativity, nature, and imaginative play. These miniature landscapes aren’t just visually appealing; they provide a unique opportunity for children to connect with the outdoors and nurture their storytelling skills. Building a fairy garden is a fantastic family activity, fostering collaboration and sparking wonder.
Why Fairy Gardens are Beneficial for Children
Beyond the sheer fun of crafting a tiny world, fairy gardens offer several developmental benefits. They encourage:
Creativity & Imagination: Designing the garden and populating it with miniature figures stimulates imaginative thinking.
Responsibility: Caring for the plants within the garden teaches children about nurturing living things.
Fine Motor Skills: Arranging small objects and planting tiny plants enhances dexterity and hand-eye coordination.
Connection to Nature: Working with soil, plants, and natural materials fosters an appreciation for the environment.
Storytelling: Children can create narratives around their fairy garden, developing language and communication skills.
Gathering Your Materials: A Checklist for Success
Before you begin, gather the necessary supplies. The beauty of fairy gardens is their adaptability – you can use readily available materials or invest in specialized items. Here’s a starting point:
Container: A broken pot, a shallow dish, a wooden box, or even a repurposed wagon wheel will work. Consider drainage if using live plants.
Soil: Potting mix is ideal for providing nutrients and drainage.
Plants: Choose miniature varieties like creeping thyme, Irish moss, succulents, or dwarf ferns. Consider the light conditions of your chosen location.
Miniature Accessories: Fairy figurines, tiny furniture, miniature houses, pebbles, and decorative stones add charm and personality.
Natural Elements: Twigs, moss, pinecones, and shells can be incorporated for a natural look.
Tools: Small trowel, watering can, and scissors.
Step-by-Step Guide to Building Your Fairy Garden
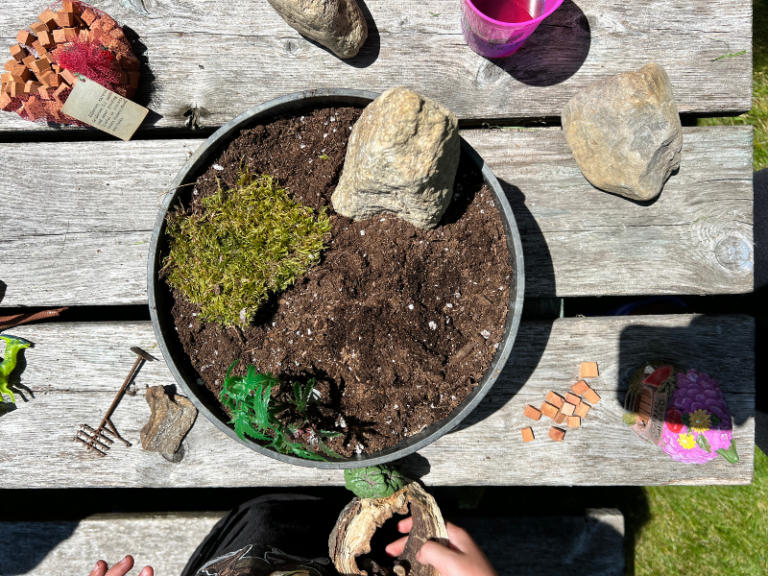
- Prepare the Base: Fill your chosen container with potting mix, leaving some space at the top.
- Create the Landscape: Gently shape the soil to create hills, valleys, or pathways. This adds visual interest and allows for different “zones” within the garden.
- Plant the Greens: Carefully plant your chosen miniature plants, considering their size and growth habits. Arrange them to create a lush and inviting landscape.
- Add the Structures: Place miniature houses, furniture, or other structures within the garden. Consider creating a focal point, such as a fairy cottage or a tiny pond.
- Decorate with Accessories: Add pebbles, stones, twigs, and other decorative elements to enhance the garden’s charm. Let your imagination run wild!
- Populate with Fairies: Place fairy figurines or other miniature characters within the garden to bring it to life.
Beyond the Basics: Expanding Your Fairy Garden
Once your fairy garden is established, there are endless possibilities for expansion and customization. Consider adding:
Water Features: A small dish filled with water can create a miniature pond or lake.
Pathways: Use pebbles, sand, or miniature stepping stones to create pathways throughout the garden.
Lighting: Tiny fairy lights can add a magical glow to the garden at night.
* Themed Gardens: Create a garden based on a specific theme, such as a woodland forest, a seaside beach, or a whimsical flower garden.
Maintaining Your Enchanted Space
To keep your fairy garden thriving, provide regular care. Water the plants as needed, remove any dead leaves or debris, and occasionally rearrange the accessories to keep things fresh. Encourage your children to participate in the maintenance, fostering a sense of responsibility and ownership.
For more creative outdoor activities, explore our Nature Creativity Pack (https://thetrendytype.com/nature-creativity-pack/) or discover 10 DIY Outdoor Games for Summer (https://thetrendytype.com/10-diy-outdoor-games-to-make-rocks/). Looking for even more summer fun? Check out 11 Ways to Have a Creative Summer with Kids (https://thetrendytype.com/11-ways-to-have-a-creative-summer-with-kids/).