Hopping into Creativity: A Fun Easter Painting Activity for Kids
Table of Contents
- Hopping into Creativity: A Fun Easter Painting Activity for Kids
- Why This Activity is Perfect for Easter
- Marshmallow Candy Stamping: A Step-by-Step Guide
- Materials You’ll Need
- Let’s Get Painting!
- instead of
- instead of
- instead of, a
- a for
- of, a
- More Easter Art Activities for Kids
- Why Choose Styrofoam Printmaking?
- Gathering Your Materials
- Step-by-Step Guide to Easter Styrofoam Prints
- 1. Design Creation
- 2. Applying the Paint
- 3. Making the Prints
- 4. Adding Embellishments (Optional)
- Beyond Easter: Expanding the Creative Possibilities
With Easter just around the corner, it’s time to embrace the season’s playful spirit with engaging art projects. While many of us find ourselves with an abundance of sweet treats like marshmallow candies, why not transform those sugary delights into vibrant works of art? This unique painting technique utilizes the candies as stamps, offering a delightful and surprisingly sophisticated creative experience for children of all ages. It’s a fantastic way to encourage artistic expression and add a personal touch to your Easter celebrations.
Why This Activity is Perfect for Easter
Beyond the sheer fun of using candy in art, this activity offers several developmental benefits. It encourages fine motor skill development as children manipulate the candies and apply paint. It also fosters creativity and imagination, allowing them to explore colors and patterns. Plus, it’s a fantastic way to repurpose leftover Easter candy, reducing waste and promoting resourcefulness.
Marshmallow Candy Stamping: A Step-by-Step Guide
This project is incredibly simple, making it perfect for even the youngest artists. With minimal materials and easy-to-follow instructions, you’ll have a gallery of colorful prints in no time. It’s a wonderful activity to enjoy with family, creating lasting memories and beautiful artwork.
Materials You’ll Need
Marshmallow Candies (various shapes and colors are ideal)
Non-toxic watercolor paints or acrylic paints
Paper or cardstock for painting
Shallow dishes or plates for holding the paint
* Optional: Glitter or other embellishments for added sparkle
Let’s Get Painting!
- Prepare Your Workspace: Cover your work surface with newspaper or a plastic tablecloth to protect it from paint spills. This will make cleanup a breeze.
- Set Up the Paint: Pour a small amount of each paint color onto separate shallow dishes or plates. This will make it easy for children to access the colors they want.
- Dip and Stamp: Gently press the bottom of a marshmallow candy into the paint, ensuring it’s evenly coated. Then, carefully press the painted candy onto the paper or cardstock to create a colorful print.
- Repeat and Experiment: Continue dipping and stamping with different colors and candies to create a unique and vibrant design. Encourage children to experiment with patterns, layering colors, and creating different effects.
- Add Embellishments (Optional): Once the paint has dried, add glitter, sequins, or other embellishments to enhance the artwork. This is a great way to personalize the creations. (you can.
- (optional: the candy.
6.
6.
6.
6.
6.
6.
6.
6.
6.
6.
6.
6.
6.
6.
6.
6.
6
6
6.
6.
6.
6.
6.
6
6’s.
6’s, and.
6’s.
6’ marshmallow candy’
6.
6’s.
1- you can’ paint.
1
1’ candy’ to look.
1
1
1
1
1
1
1
1
1
1
1
1
1
1
1
1
1
1
1.
candy for.
candy for
candy for
candy for
candy’ a’ for
instead of, instead of.
instead of
instead of
instead of
instead of, a
###
a for
###
###
###
###
###
###
###
###
###
###
###
###
###
###
###
###
###
###
###
###
###
###
###
###
###
###
###
###
###
###
###
###
###
###
###
###
###
###
###
###
###
###
###
###
###
###
###
###
###
the
the
the
paint, and, and, and, and, and, and, and, and, and, and, and, and, and, and, and, and, and, and, and, and, and, and, and, and, and, and, and, and, and, the, and, and, and, and, and, and, and, and, and, and, and, and, and, and, and, and, and, and, and, and, and, and, and, and, and, a creative, and, a, a, a
of, a
###
###
###
###
###
###
###
###
###
###
###
###
###
###
###
###
###
###
###
###
###
###
###
###
###
###
###
###
###
###
###
###
###
###
###
###
###
###
###
###
###
###
###
###
###
###
###
###
###
###
###
###
###
on on on on on on on on on on on, and on, texture.
candy, and on, on, on, and, and on, on, and, and, and on on on, and on, on, and on, and, and, and, and, texture, texture texture texture texture texture texture texture texture texture texture texture texture texture texture texture texture texture texture texture texture texture texture texture texture texture texture texture texture texture texture texture printing” />
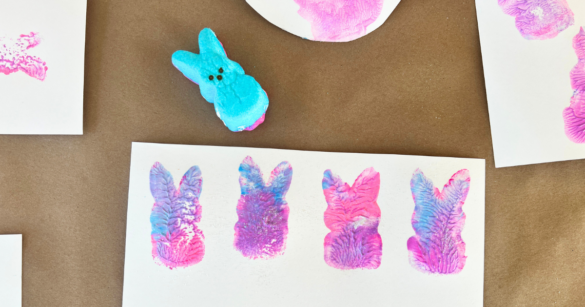
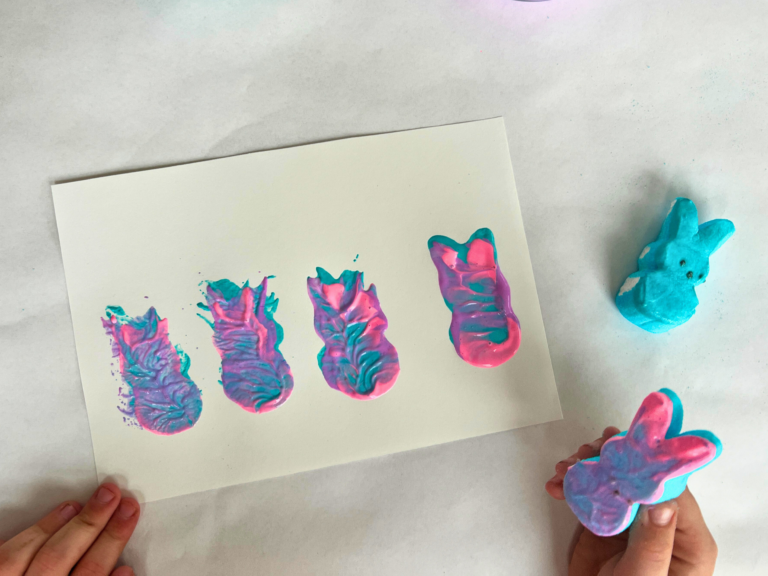
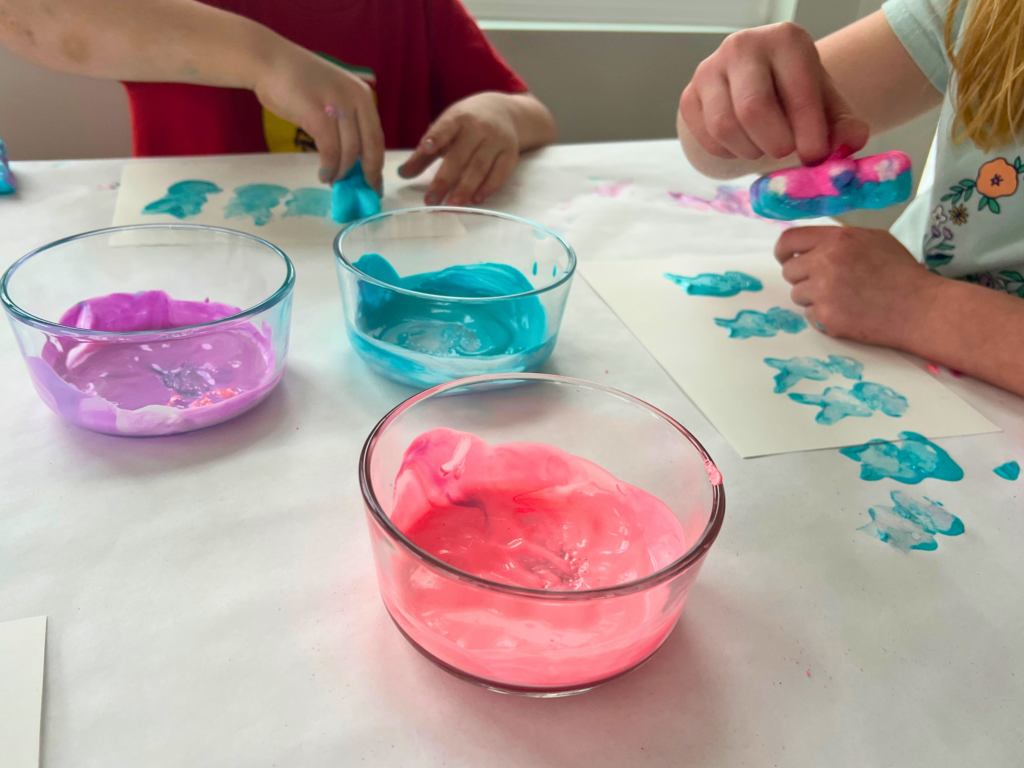
After a few prints, my kids started dipping the Peeps into multiple paint colors to give their pictures a swirly look and they came out so pretty!
Carefully and firmly, press the paint-coated Peep onto your paper. Gently lift up the Peep to reveal your print!
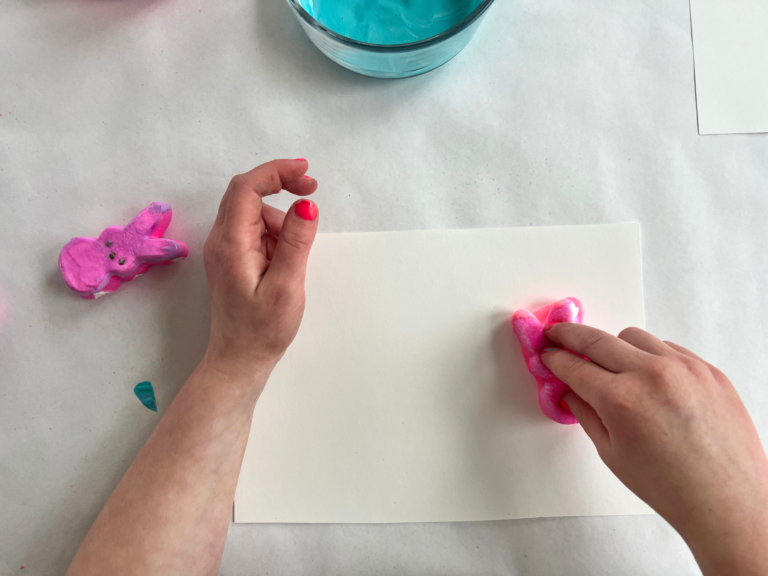
After a while, the Peeps start to get soggy with paint, so you may want to have some extras on hand.
While the paint is still wet, you can sprinkle on some glitter to give your Peep a sugary and sparkly look!
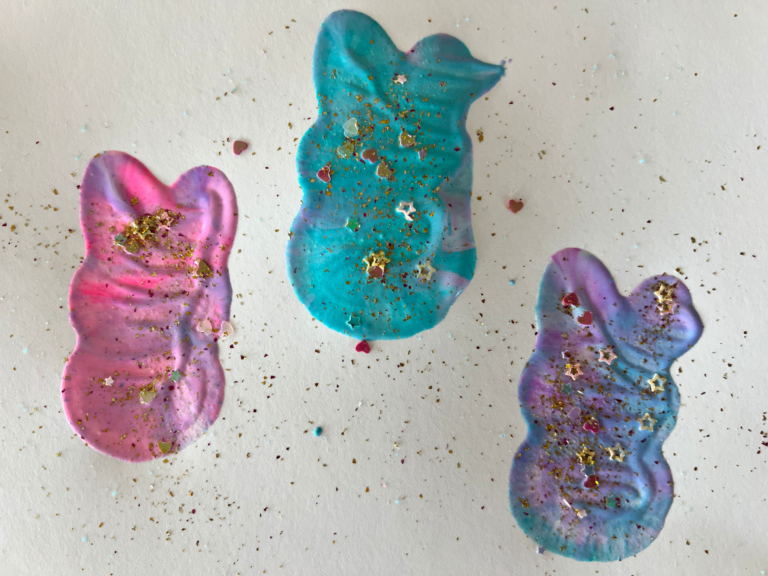
Once dry, your peep prints are an adorable Easter decoration to hang up or make a sweet card to tuck into an Easter gift or basket.
We had so much fun making these prints! I have a feeling we will be making this Easter art every year!
More Easter Art Activities for Kids
- 8 Easter Crafts for Kids this Spring
- 11 Easter Craft Ideas for Kids
- 31 Easter Activities for Kids
- 2023 Easter Basket Ideas for Kids
- How to Paint Paper Easter Eggs
- Creative Easter Prints: A Fun & Easy Art Activity for Kids
Looking for a fresh and engaging Easter art project that goes beyond traditional egg dyeing? Styrofoam printmaking offers a wonderfully tactile and visually stimulating experience for children of all ages. This technique is surprisingly simple, requires minimal materials, and allows for incredible creative freedom. It’s a fantastic way to introduce basic printmaking concepts while fostering imagination and artistic expression. In 2024, art-based learning is increasingly recognized for its benefits in developing fine motor skills, problem-solving abilities, and self-expression – making this activity a perfect fit for both home and classroom settings.
Why Choose Styrofoam Printmaking?
Unlike more complex printmaking methods, styrofoam printmaking is incredibly accessible. It doesn’t require a press or specialized tools, making it ideal for young artists. The soft surface of styrofoam readily accepts impressions, allowing children to create unique textures and designs. This process encourages experimentation and allows for happy accidents, fostering a sense of playful discovery. Plus, cleanup is a breeze! If you’re looking for more ways to engage your kids with art, explore our guide to watercolor techniques for inspiring projects.
Gathering Your Materials
The beauty of this project lies in its simplicity. Here’s what you’ll need:
Styrofoam trays or sheets: Recycled food trays work perfectly!
Craft sticks or pencils: For creating designs.
Non-toxic paint: Tempera or acrylic paints are excellent choices.
Paintbrushes or rollers: For applying paint to the styrofoam.
Paper: Construction paper, cardstock, or even plain white paper will work.
Optional: Glitter, sequins, or other embellishments for added flair.Step-by-Step Guide to Easter Styrofoam Prints
1. Design Creation
Begin by having your child draw their desired Easter designs onto the styrofoam using a craft stick or pencil. Encourage them to think about classic Easter motifs like bunnies, chicks, eggs, flowers, or even abstract patterns. The pressure applied will create indentations in the styrofoam, forming the raised areas of the print. For younger children, you can pre-draw simple shapes for them to trace or fill in.
2. Applying the Paint
Once the designs are complete, it’s time to add color! Using a paintbrush or roller, evenly coat the surface of the styrofoam with paint. Be careful not to apply too much paint, as this can result in blurry prints. A thin, even layer works best. Consider using multiple colors for a vibrant and dynamic effect.
3. Making the Prints
Carefully place a piece of paper over the painted styrofoam. Gently press down on the paper, ensuring even contact across the entire surface. Lift the paper to reveal the print! Repeat this process as many times as desired, experimenting with different colors and paper types.
4. Adding Embellishments (Optional)
Once the prints are dry, encourage your child to add embellishments like glitter, sequins, or markers to further personalize their creations. This is a great opportunity to explore different textures and materials. If your child enjoys mixed media, check out our article on mixed media art for more inspiration.
Beyond Easter: Expanding the Creative Possibilities
While this project is perfect for Easter, the possibilities extend far beyond the holiday. Children can create prints of animals, plants, geometric shapes, or anything else their imagination conjures. Experiment with different tools for creating designs, such as cotton swabs, toothpicks, or even textured materials like bubble wrap. This technique is a fantastic way to explore pattern making and develop artistic skills year-round.
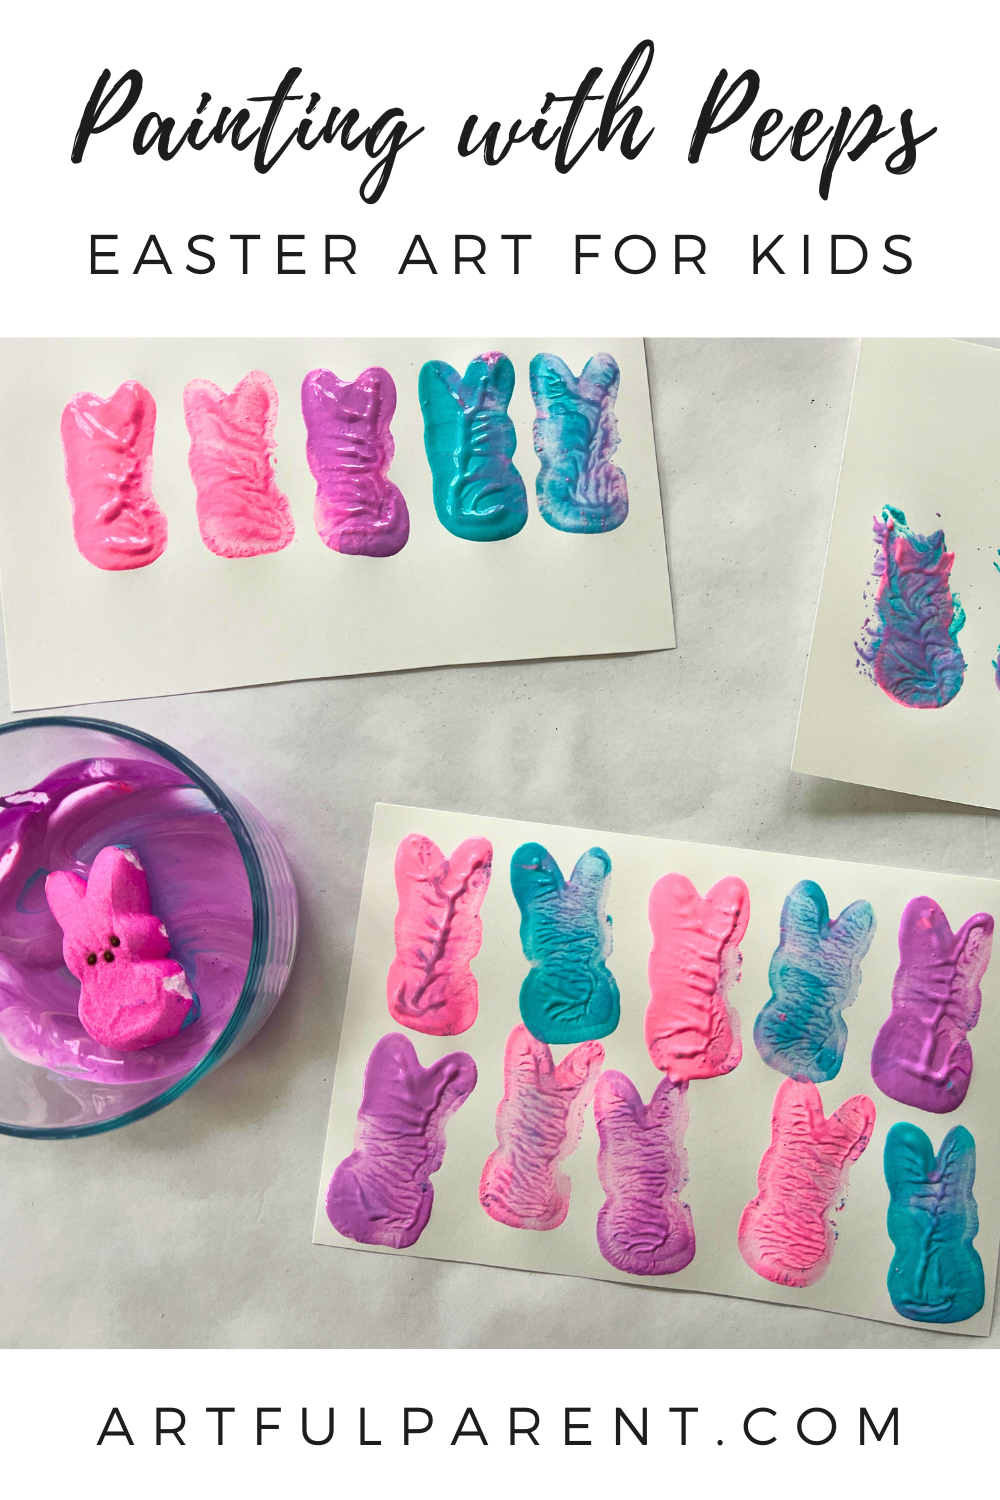
Photo by Andrea Martelle