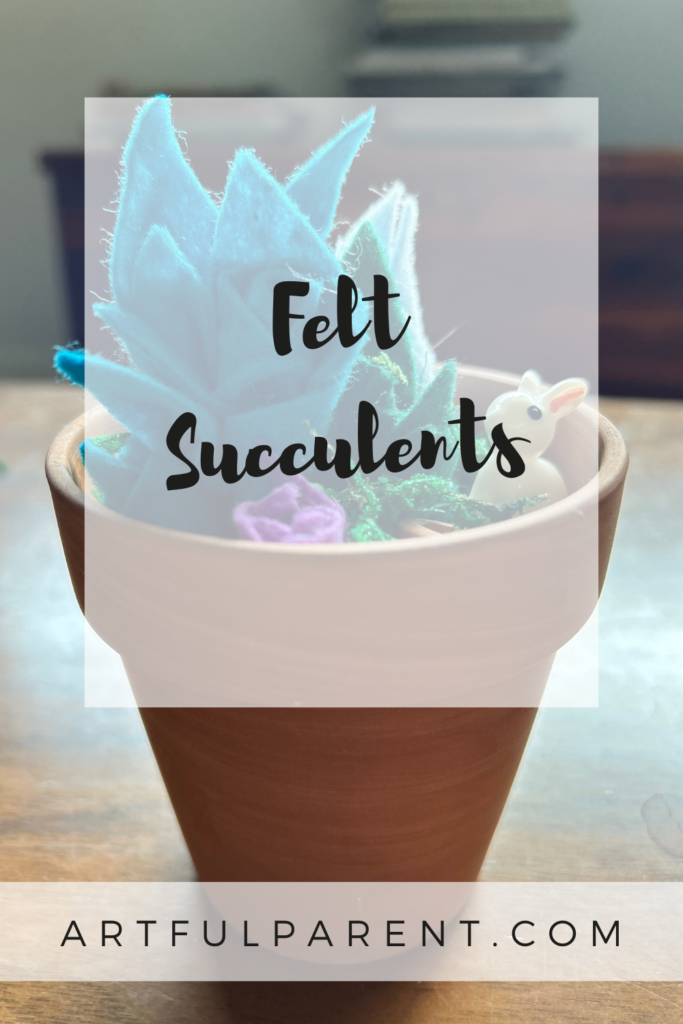
Cultivating Creativity: A No-Glue Felt Succulents Garden for Kids
Table of Contents
- Cultivating Creativity: A No-Glue Felt Succulents Garden for Kids
- Setting Up Your Miniature Desert Oasis
- Materials Needed
- Crafting the Succulents: A Step-by-Step Guide
- Beyond the Basics: Expanding the Creative Potential
- Crafting Charming Felt Succulents: A Step-by-Step Guide
- Why Choose Felt Succulents?
- Gathering Your Materials
- Step-by-Step Instructions
- 1. Preparing Your Planters
- 2. Cutting Your Felt Strips
- 3. Exploring Different Cutting Techniques
- 4. Rolling and Shaping Your Succulents
- Displaying Your Felt Garden
- Craft a Charming Felt Succulent Garden: A Fun & Easy DIY Project
- Why Felt Succulents?
- Materials You’ll Need
- Step-by-Step Guide to Creating Your Felt Succulents
- Beyond the Basics: Expanding Your Creativity
- More Fun Nature-Inspired Crafts for Kids
- Decoding Dress Codes: A Modern Guide to Navigating Fashion Expectations
- The Evolution of Dress Codes
- Breaking Down the Basics: Common Dress Code Definitions
- Navigating Nuances: Decoding Hidden Expectations
- Modernizing Your Approach: Personal Style Within Boundaries
Updated March 2025
Looking for a calming and engaging activity to spark your child’s imagination? This delightful felt succulents garden project offers a wonderful opportunity for creative expression without the mess of glue! It’s perfect for a cozy afternoon indoors, encouraging fine motor skills and artistic exploration. We at The Trendy Type believe in fostering creativity through accessible and enjoyable crafts, and this project perfectly embodies that philosophy.
While many art projects embrace vibrant chaos, this one offers a refreshing sense of tranquility. The diverse forms, textures, and colors found in succulents provide a rich source of inspiration, allowing children to create unique, nature-inspired artwork in a relaxed and peaceful environment. This project is a fantastic way to introduce children to the beauty of botanical forms and encourage their artistic interpretation.
Setting Up Your Miniature Desert Oasis
Here’s how to guide your little ones in creating their own charming felt succulents garden.
!
Materials Needed
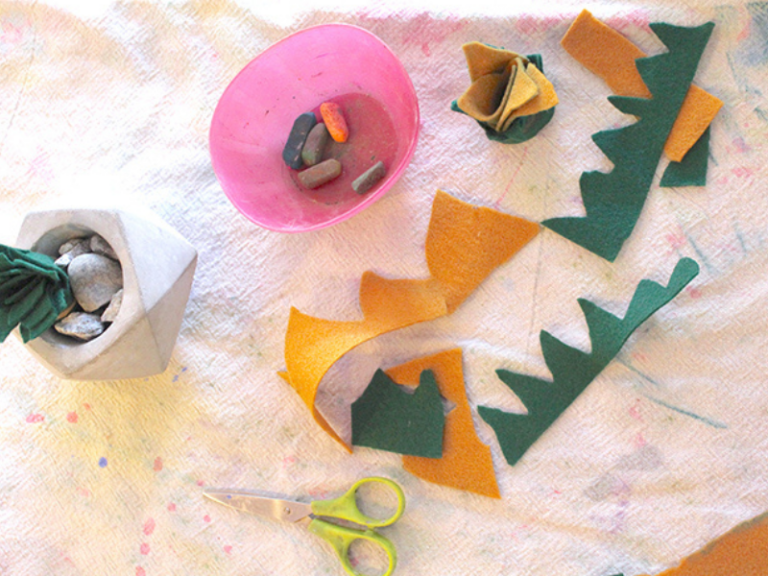
Terracotta Pot or Container: Choose a small pot or any container that suits your child’s aesthetic. Consider upcycling a tin can or small basket for an eco-friendly option!
Craft Felt: A variety of green shades are essential, but don’t be afraid to incorporate reds, oranges, and yellows to mimic the subtle hues found in real succulents. Explore different textures of felt for added visual interest.
Rubber Bands: These will be used to create the basic shapes of the succulents.
Scissors: Child-safe scissors are recommended, with adult supervision.
Chalk Pastels: These add depth and dimension to the felt succulents, creating a more realistic look.
Optional: Decorative Elements: Consider adding small pebbles, moss, or miniature figurines to enhance the garden scene. If your child enjoys jewelry making, consider adding some beads for a unique touch.
Crafting the Succulents: A Step-by-Step Guide
- Shape Creation: Begin by cutting the felt into various shapes – ovals, triangles, and rounded forms – to represent different succulent leaves. Encourage your child to experiment with different sizes and proportions.
- Bundling with Rubber Bands: Gather several felt pieces together and secure them with a rubber band. This creates the base of the succulent. Adjust the felt pieces to create a pleasing arrangement.
- Adding Dimension: Layer additional felt pieces around the rubber band, tucking them in to create volume and texture. Encourage your child to overlap the pieces and experiment with different angles.
- Pastel Accents: Gently rub chalk pastels over the felt succulents to add shading and highlights. This will bring the succulents to life and create a more realistic appearance.
- Arranging the Garden: Once several succulents are created, arrange them inside the chosen container. Encourage your child to create a miniature landscape, considering the height and spacing of each succulent.
Beyond the Basics: Expanding the Creative Potential
This project is a wonderful starting point for further exploration. Encourage your child to research different types of succulents and try to replicate their unique forms. They can also experiment with different materials, such as fabric scraps, yarn, or even natural elements like twigs and leaves.
For more inspiring craft ideas and resources, be sure to explore The Trendy Type’s collection of kids’ craft projects. We believe that every child is an artist, and we’re dedicated to providing the tools and inspiration they need to express their creativity.
This felt succulents garden is more than just a craft project; it’s an opportunity to connect with nature, foster imagination, and create lasting memories. So gather your materials, unleash your creativity, and let the gardening begin!
Crafting Charming Felt Succulents: A Step-by-Step Guide
Succulents have become a staple in modern home décor, celebrated for their unique textures and low-maintenance appeal. But what if you could bring that botanical beauty indoors without the need for watering or sunlight? This guide will walk you through creating delightful, handcrafted felt succulents – a fun, accessible project for crafters of all ages and skill levels. These charming creations add a pop of color and personality to any space, and are a fantastic way to explore creativity and fine motor skills. If you’re looking for unique DIY home decor ideas, this is a perfect starting point.
Why Choose Felt Succulents?
Real succulents, while beautiful, require specific care to thrive. Felt succulents offer all the aesthetic benefits without the commitment. They’re incredibly versatile – perfect for adorning shelves, creating miniature gardens, or even embellishing gifts. Plus, the process of making them is incredibly therapeutic and rewarding. They’re a fantastic alternative for those with less-than-green thumbs, or for adding a touch of greenery to spaces with limited light.
Gathering Your Materials
Before you begin, you’ll need a few simple supplies. Don’t worry about needing specialized tools – most of these items you likely already have at home!
Felt sheets in a variety of greens (and other colors for added flair!)
Small planters or containers (terracotta pots, repurposed teacups, or even small rocks work beautifully)
Small, sharp scissors (fabric scissors are ideal, but regular scissors will do)
Optional: Hot glue gun (for securing felt pieces, though rolling and tucking often works just as well)
Step-by-Step Instructions
Let’s dive into the crafting process!
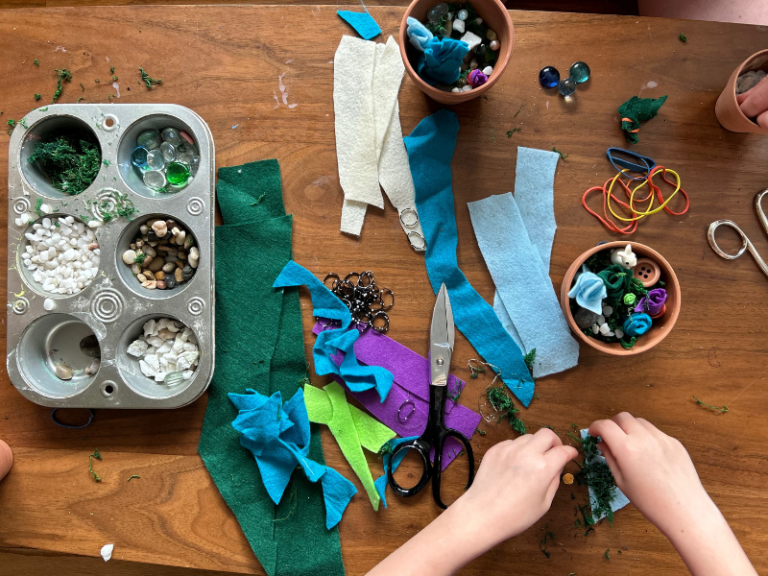
1. Preparing Your Planters
Begin by partially filling your chosen planters with small rocks or pebbles. This provides weight and stability for your felt succulents. Approximately halfway full is a good starting point. This also mimics the drainage layer found in real plant pots.
!
2. Cutting Your Felt Strips
Next, cut your felt into strips approximately 12 inches long. The width of the strips will determine the height of your finished succulents, so experiment! For taller, more dramatic succulents, cut wider strips (around 4 inches). For smaller, more delicate plants, opt for narrower strips (around 1-2 inches).
!
Pro Tip: Offering a variety of widths will create a more visually interesting and realistic arrangement.
3. Exploring Different Cutting Techniques
This is where the fun really begins! Experiment with different cutting techniques to create a variety of succulent shapes.
Arched Cuts: Cutting small arches into the felt will create a rose-like succulent when rolled up.
Zigzag Cuts: Zigzag cuts will result in a spiky, cactus-like plant.
Wide Petal Cuts: Larger, wider petals will create a fuller, rose-like succulent.
Fringe Cuts: Simply cutting a fringe along the edge of the felt will create a floppy, cascading plant.
Don’t be afraid to get creative and try your own variations! There’s no right or wrong way to do it. If you’re working with younger children, this step might require some patience and assistance.
4. Rolling and Shaping Your Succulents
Now it’s time to bring your creations to life! Gently roll each felt strip, starting from one end. As you roll, tuck and shape the felt to create the desired succulent form. You can secure the roll with a tiny dab of hot glue if desired, but often the tension of the roll will hold it in place.
If you find your child getting tired of cutting, encourage them to start rolling the felt anyway – even partially cut strips can be transformed into charming succulents!
Displaying Your Felt Garden
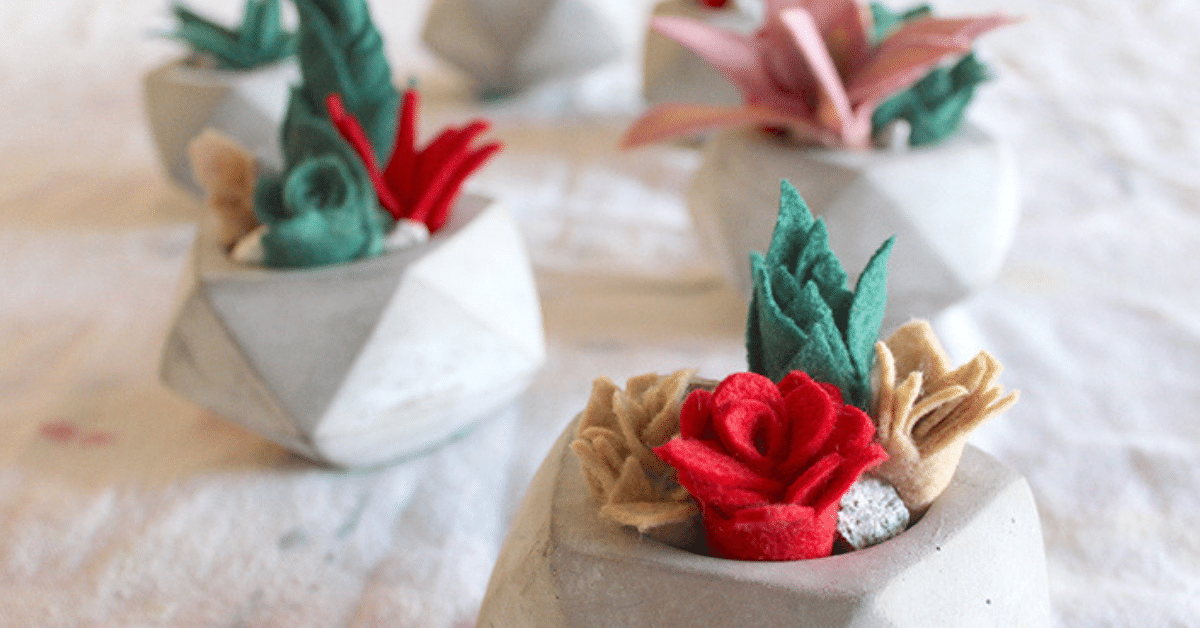
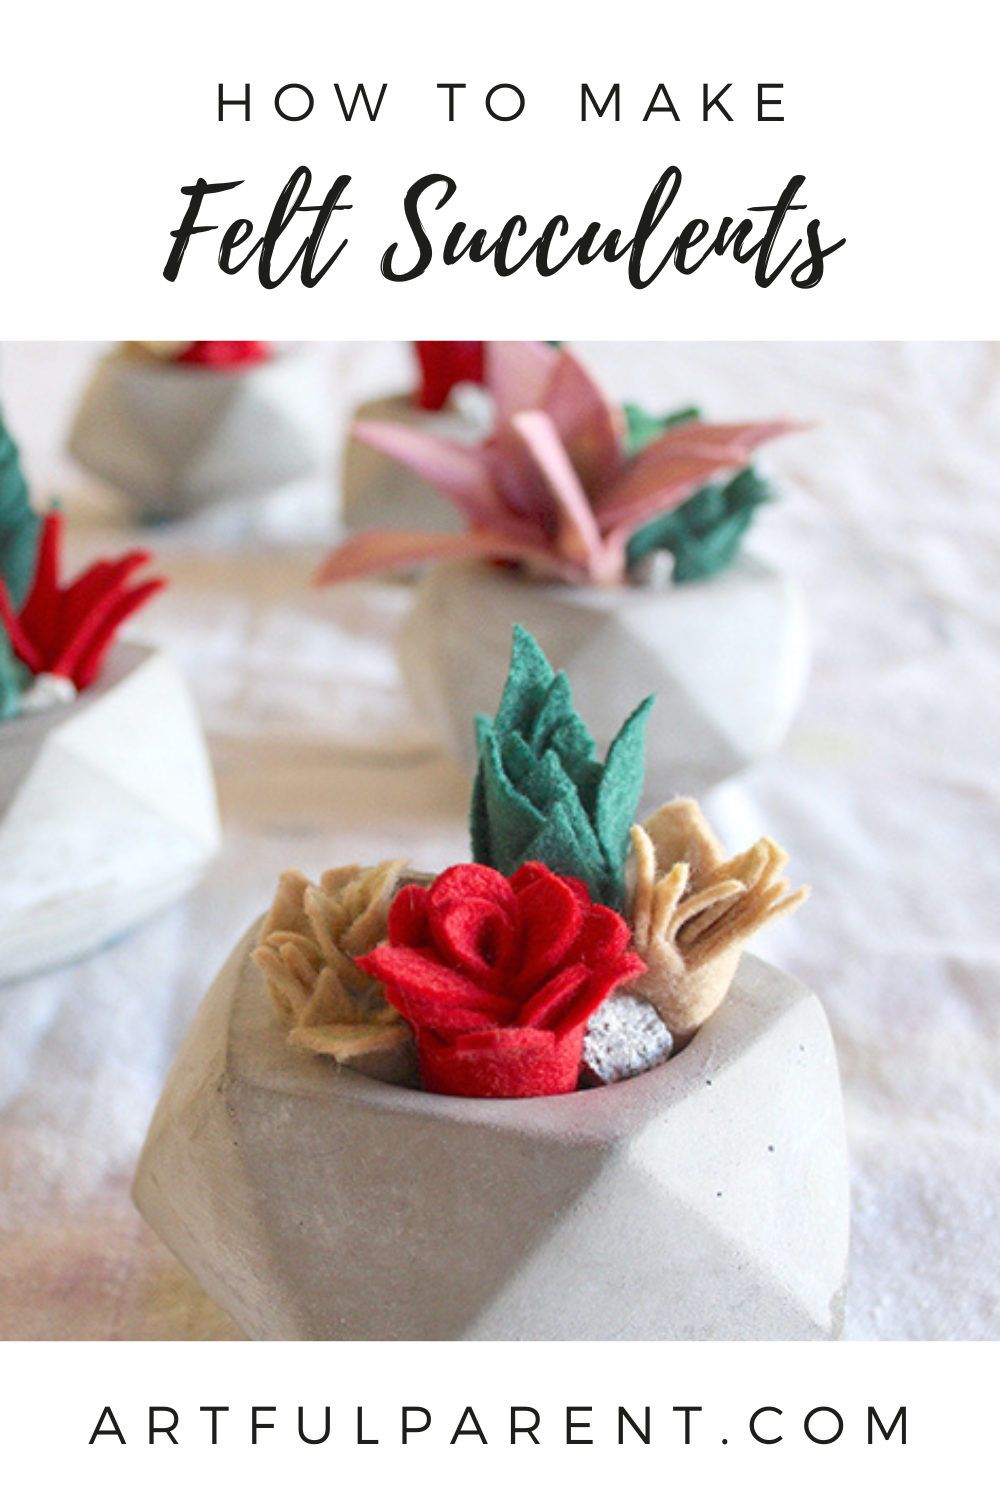
Once you’ve created a collection of felt succulents, it’s time to display them! Arrange them in your prepared planters, and group them together to create a miniature garden. These delightful creations are perfect for adding a touch of whimsy to shelves, desks, or any space that needs a little bit of green.
For more inspiration on bringing handmade touches into your home, explore our guide to creative home crafts.
Enjoy the process and let your creativity bloom!
Craft a Charming Felt Succulent Garden: A Fun & Easy DIY Project
Looking for a delightful and engaging craft activity for kids (and adults!)? Creating a miniature succulent garden from felt is a fantastic way to spark creativity, practice fine motor skills, and bring a touch of greenery indoors – no watering required! This project is wonderfully adaptable, making it perfect for individual expression and collaborative fun.
Why Felt Succulents?
Real succulents are beautiful, but require specific care. Felt succulents offer all the aesthetic appeal without the responsibility! They’re a fantastic alternative for those without a green thumb, or for children learning about plants and nature. Plus, crafting with felt is a wonderfully tactile experience, promoting sensory development and artistic exploration. Did you know that crafting can also reduce stress and boost mood? It’s a win-win!
Materials You’ll Need
Felt sheets in various shades of green (and other colors for flowering succulents!)
Scissors
Rubber bands
Small rocks or pebbles
A planter or container of your choice
Step-by-Step Guide to Creating Your Felt Succulents
1. Cutting the Felt Strips:
Begin by cutting strips of felt, approximately 1-2 inches wide and 6-8 inches long. The length isn’t critical, as you’ll be rolling them up. Encourage children to experiment with different shades of green to create variety in their succulent garden. Consider introducing them to the concept of color palettes and how different shades complement each other.
2. Rolling and Securing:
Now for the fun part! Carefully roll each felt strip as tightly as possible, creating a cylindrical shape. Once rolled, secure the base of the “succulent” with a rubber band. This will keep it from unraveling. For a more realistic look, slightly bend and shape the rolled felt to mimic the natural curves of a succulent.

3. Planting Your Miniature Garden:
Once you have a collection of felt succulents, it’s time to “plant” them in your chosen container. A small terracotta pot, a decorative bowl, or even a repurposed tin can will work beautifully.

4. Adding the Finishing Touches:
To create a more realistic garden effect, fill the container with small rocks or pebbles. This will provide a base for your felt succulents and add texture to the display. Arrange the succulents as desired, creating a miniature landscape. For an extra touch of whimsy, consider adding other felt elements, such as flowers or cacti.
Beyond the Basics: Expanding Your Creativity
Experiment with Colors: Don’t limit yourself to green! Use a variety of felt colors to create unique and vibrant succulents.
Add Details: Use embroidery floss or small beads to add details like spines or flower petals.
Create a Theme: Design a garden with a specific theme, such as a desert landscape or a tropical rainforest.
Combine with Other Crafts: Incorporate your felt succulents into a larger diorama or miniature scene.
More Fun Nature-Inspired Crafts for Kids
Looking for more ways to connect with nature through crafting? Check out these related activities:
How to Make a 3D Nature Suncatcher
Two Nature Inspired Art Activities for Kids
13 Nature Walk Ideas (+ FREE Scavenger Hunt Printable)
* How to Make a Nature Diorama for Kids
This felt succulent garden is a delightful project that encourages creativity, fine motor skill development, and an appreciation for the beauty of nature. So gather your materials, let your imagination run wild, and create a miniature garden that will bring joy for years to come!
For many, understanding dress codes can feel like deciphering a secret language. From the seemingly simple “casual” to the more complex “business formal,” knowing what to wear – and what not to wear – can be surprisingly stressful. This guide breaks down common dress codes, offering clarity and confidence so you can always dress appropriately and stylishly.
The Evolution of Dress Codes
Historically, dress codes were rigid and dictated by social class and specific institutions. Think debutante balls with strict gown requirements or the formal attire expected in Victorian-era workplaces. Today, while formality still exists, dress codes have become more fluid and adaptable, reflecting a more relaxed and diverse society. However, the underlying principle remains: demonstrating respect for the occasion and the people present. In 2023, a LinkedIn study revealed that 69% of professionals believe appropriate attire significantly impacts career advancement, highlighting the continued relevance of understanding these unspoken rules.
Breaking Down the Basics: Common Dress Code Definitions
Let’s explore the most frequently encountered dress codes and what they typically entail:
Casual: Often the most misinterpreted, “casual” doesn’t mean anything goes. It suggests comfortable, everyday clothing. Think well-fitting jeans, a t-shirt or sweater, and sneakers or flats. Avoid overly revealing clothing, ripped or stained items, and athletic wear unless the context specifically allows it. A good rule of thumb: if you’re unsure, err on the side of slightly more polished.
Smart Casual: This is where things get interesting. “Smart casual” bridges the gap between casual and business attire. It allows for more personality and creativity than business casual, but still requires a level of sophistication. Consider dark-wash jeans or chinos paired with a button-down shirt or a stylish blouse. Blazers, cardigans, and loafers or dressy sneakers are excellent additions. For women, dresses or skirts with appropriate tops also work well.
Business Casual: A staple in many workplaces, business casual aims for a professional yet comfortable look. This typically includes dress pants or skirts, button-down shirts or blouses, sweaters, and closed-toe shoes. Blazers are often encouraged. Avoid overly casual items like t-shirts, shorts, and flip-flops. A recent survey by CareerBuilder found that 36% of employers have sent employees home due to inappropriate attire, emphasizing the importance of adhering to business casual guidelines. If you’re looking for inspiration, check out our guide to Workwear Essentials for building a professional wardrobe.
Business Formal: This is the most conservative dress code, typically reserved for important meetings, interviews, or formal events. For men, this means a tailored suit (navy, gray, or black) with a dress shirt, tie, and leather dress shoes. Women should wear a suit, a tailored dress, or a skirt/pantsuit with a blouse. Closed-toe pumps are the standard footwear.
Sometimes, dress codes aren’t explicitly stated. Here’s how to decipher the unspoken rules:
Consider the Context: Where are you going? A daytime garden party calls for different attire than an evening gala.
Observe the Environment: Pay attention to what others are wearing. This provides valuable clues about the expected level of formality.
When in Doubt, Ask: If you’re unsure, don’t hesitate to ask the host or a colleague for clarification. It’s always better to be safe than sorry.
Accessorize Strategically: Accessories can elevate any outfit. A statement necklace, a stylish scarf, or a well-chosen belt can add personality and polish. For more inspiration on accessorizing, explore our Accessories Guide.
Modernizing Your Approach: Personal Style Within Boundaries
While adhering to dress codes is important, it doesn’t mean sacrificing your personal style. Here’s how to incorporate your individuality while remaining appropriate:
Focus on Fit: Well-fitting clothes always look more polished and professional.
Experiment with Color and Texture: Add personality with subtle pops of color or interesting textures.
Choose Quality Fabrics: Investing in quality fabrics will elevate your look and make you feel more confident.
Don’t Be Afraid to Accessorize: Accessories are a great way to express your personality and add a finishing touch to your outfit.
Explore Sustainable Fashion: Consider incorporating eco-friendly and ethically sourced clothing into your wardrobe. Learn more about Sustainable Fashion on our blog.
By understanding the nuances of dress codes and incorporating your personal style, you can confidently navigate any fashion expectation and make a lasting impression.